
"I want members to buy next week's new product first." "It's a limited item, so I want to cap how many each person can buy." "Once it sells out, I want to switch to restock alerts." The moment you try to sell in any way other than listing a product normally, Shopify's settings are scattered across different screens, and it gets hard to know where to start.
The decisions behind an early-access or limited sale actually boil down to four. When to sell, who can buy, how many each person can buy, and what to do after it sells out. Work through them in that order and the settings you need — and whether each one is a job for Shopify's built-ins or a job for an app — fall into place on their own.
Start with the big picture: what each sales approach requires
"Early-access sale" and "limited sale" aren't single features — they're combinations of several decisions. Work backwards from what you want to do and the settings you need look like this.
| What you want to do | The setting it needs | Detailed steps |
|---|---|---|
| Take orders for a product before it's in stock | Pre-order start and end dates | How to start pre-orders |
| Start selling automatically at launch time | Publishing and sales schedule | Automatic launch-time switching |
| Sell to members or specific customers first | Purchase eligibility (sign-in, tags) | Setting purchase limits |
| Cap how many each person can buy | Quantity and order-count limits | Setting purchase limits |
| Keep taking orders after sellout | Switch to pre-orders or notification signups | Choosing between pre-orders and restock alerts |
| Automate out-of-stock messaging | Restock alerts | Getting started with restock alerts |
As the table shows, early-access and limited sales aren't one setting but a combination of several. A sale like "launch the new product Friday at 20:00, members buy first, two per customer" means configuring three things on the same product: a launch schedule, purchase eligibility and a quantity limit.
Below we go through the four decisions in order. You only need to pick the ones that apply to your own sales plan.
Take a limited-edition bag launching next month as an example that uses all four. With a plan like "launches on the 20th at 20:00; members get early access from the 17th, two per customer; after sellout it switches to notification signup for the next restock", you'd set on the same product: an early-access schedule (decision 1), "Tag required" purchase eligibility set to the member tag (decision 2) plus a two-per-customer quantity cap (decision 3), and a switch to notification signup on stock-out (decision 4). Decide upfront whether eligibility reverts to "No restriction" on the general-sale date or changes automatically on a schedule.
Jump to a specific task or problem
Once you have decided how to sell, the following articles cover each setup, operation, and fix in detail.
- Collect notify-me signups before launch → How to gather pre-launch signups
- Sell made-to-order products → Managing made-to-order orders
- Sell to members only → Members-only sales and customer tags
- Prepare storefront and notification text in multiple languages → Multilingual pre-order messaging
- Notify staff automatically about pre-orders or shipping delays → SellRules and Shopify Flow operations
- Review pre-order performance regularly → Weekly pre-order review
- Handle orders mixing pre-order and regular items → Mixed-order shipping and customer messaging
- The pre-order button does not appear → What to check when the pre-order button is missing
- Restock notifications are not arriving → Troubleshooting missing restock notifications
- Not sure which pre-order app to choose → How to choose a pre-order app
- Switch from your current pre-order app → App migration checklist
Decision 1: when to sell (launch date, pre-orders, sales window)
The first thing to decide is timing. If the launch date is set, use a schedule; if you're still waiting on stock, take pre-orders — that's the basic split.
For a new product with a fixed launch date, you can set the buy button in advance to switch to "on sale" at launch time. A product launching Friday at 20:00 can start selling without you opening the admin on the day. It also works for midnight and early-morning launches, and for seasonal products with a fixed sales window. The setup is covered in detail in the article on automatic launch-time switching.
Products still awaiting stock, or products made after the order comes in, can take orders ahead of time as pre-orders. In that case, writing the expected shipping timeframe on the product page is essential. Pre-orders mean a longer wait for delivery, and without a shipping explanation you invite customer anxiety and support inquiries. The full setup steps are in the pre-order checklist.
Note that "sell to members first" early access is less a launch-date question than a "who can buy" question. That's the next decision.
Decision 2: who can buy (purchase eligibility)
Who can buy is set by purchase eligibility. This is the core of limited and early-access sales.
Purchase eligibility comes in four types: "No restriction", "Sign-in required", "Tag required" and "Sales suspended". For member early access, you'd set "Tag required" during the early period so only customers carrying the member tag can buy, then switch to "No restriction" on the general-sale date.
One caution: "Sign-in required" and "Tag required" are also settings that stop brand-new non-member customers on the spot. If you're limiting purchases to members only during the early period, deciding the general-sale switchover date upfront keeps you from locking new customers out for too long.
Decision 3: how many each person can buy (quantity and order-count caps)
How many each person can buy is set by quantity and order-count caps. Quantity caps come in three types: "Maximum per order", "Maximum per customer" and "Maximum orders per customer".
If you want "one per customer", a per-order cap alone isn't enough — the customer can just place two separate orders and buy past the cap. Combining it with a per-customer lifetime cap is the reliable approach. How to read the settings screen, and how to pick the counting method that blocks the different-size workaround, are explained with screenshots in the article on enforcing "one per customer".
Decision 4: what happens after sellout (switch to pre-orders or restock alerts)
Deciding what happens after sellout ahead of time saves you from editing the product page every time something runs out. If the next restock is confirmed, switch to pre-orders; if it's undecided, use restock alerts — that's the rule of thumb.
For a product whose next restock date you know, switching to pre-order intake the moment it sells out keeps orders coming in. On the other hand, taking pre-orders on a product with no restock in sight leaves you holding orders you can't give a shipping estimate for — in that case, collecting notification signups for restock announcements is the safer choice. This judgment call and the setup flow are compared in detail in the article on turning sold-out products into future orders.
If you go the notification route, check the signup form placement and the notification email content first, as the restock alert article explains. The wording customers receive becomes their first impression when the item comes back.
Where Shopify's built-in features are enough — and where they fall short
Used on their own, some of these are covered by Shopify's built-in features. Scheduling a product page to publish at a set date and time, continuing to accept orders when out of stock, and a store-wide cap on cart quantities can all be done from the Shopify admin alone.
Built-in scheduled publishing works by hiding the page itself until launch, though. Shopify has no native way to keep the page public while switching the intake state — "announcement", "pre-orders open", "on sale" — on a per-product schedule.
Built-in features also fall short in cases like these.
- You want to switch the buy button's state on a public page on a per-product schedule
- You want to limit purchases to members or customers with a tag
- You want different quantity caps per product, or limits on each customer's lifetime total
- You want only sold-out products to switch automatically to pre-orders or notification signups
In short, built-in features cover "one-off settings that apply uniformly across the whole store", while per-product and per-customer conditions — and combinations of multiple rules — are app territory. Shopify's own help points merchants who want to limit order quantities toward using an app.
Installing an app doesn't automate everything, either — the store picks which features to use. Partial adoption like "only purchase limits" or "only the launch schedule" is a perfectly normal way to use one.
Managing it all together in SellRules
In SellRules these decisions split into rules and schedule settings. The pre-order, made-to-order and stock-out schedules cover "when to sell" and "what happens after sellout", while purchase restrictions handle "who can buy" and "how many".
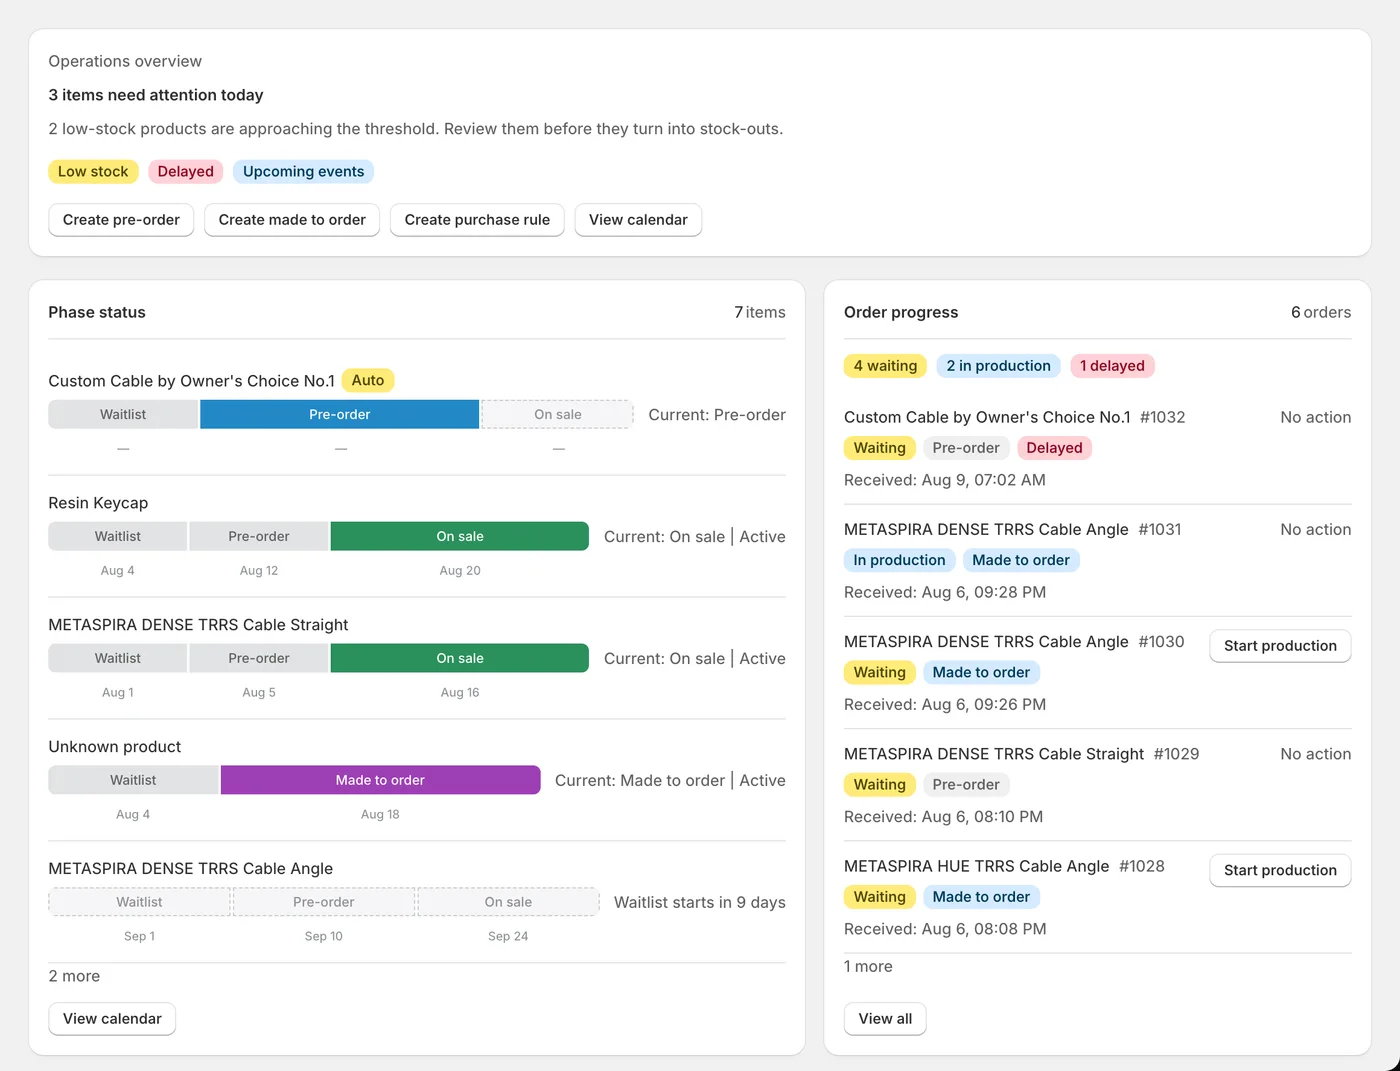
The per-screen steps are in the SellRules user guide; this article focuses on how to make the overall decisions.
For rollout, rather than configuring every product from day one, we recommend picking one product that's launching next and trying it on that product first. Once you've seen how the switching behaves and how it looks to customers, you can widen the scope. The 10-day free trial checklist covers what to verify.
Things to watch when deciding
Combining features brings caveats you don't get with single-feature use.
No setup can completely block limit evasion. Purchase limits work on orders Shopify can identify as coming from the same customer, so different accounts and unidentifiable guest checkouts can't be fully stopped. Adding "Sign-in required" narrows the gap, but it's best thought of as "far less manual cancellation work" rather than an airtight barrier.
Pre-orders and shipping promises are the store's responsibility. The app handles intake and switching — it doesn't guarantee restocks or shipping. Set realistic shipping estimates, and have a process for telling customers when they change.
Unexplained limits breed frustration. A bare "you can't buy this" message leaves a worse impression than the limit itself. Explain why the limit exists and when customers will be able to buy, on the product page and in your message settings.
Watch where each setting lives. The pre-order, made-to-order and stock-out schedule screens also have purchase restriction fields, but those are separate settings from the purchase restrictions you create under Rules. Losing track of which screen you entered what into leads to forgotten removals and double limits.
Frequently asked questions
Do I still need an app if I only want an early-access sale?
If all you need is 'only customers with a member tag can buy', purchase eligibility alone covers it. But Shopify has no built-in eligibility mechanism, so doing it without an app means sharing the product page URL only with tagged customers as a workaround.
Can I use pre-orders and restock alerts together?
Yes, they work together. The usual split is to switch products with a confirmed restock to pre-orders, and only collect notification signups for products whose restock is uncertain. Which one you choose comes down to whether the next restock is definite.
What happens when I set multiple rules on the same product?
A launch schedule and purchase limits can run on the same product, so 'launch Friday at 20:00, limit two per customer' works. However, the purchase restriction fields on the pre-order, made-to-order and stock-out schedule screens are separate settings from the purchase restrictions you create under Rules — noting which one you filled in prevents confusion.
Do limits apply to guests who check out without an account?
Partly. The per-order quantity cap applies to guests too, but per-customer lifetime totals and order counts only cover orders identifiable as the same customer. To include guest checkouts in a limit, combine it with 'Sign-in required'.
Pricing and how to try it
SellRules has a single Launch plan at $7.99 USD per month, with pre-orders, schedules, restock alerts and purchase limits all covered at the same price. There's a 10-day free trial, and uninstalling during the trial means you're never charged. Billing runs through the Shopify App Store's billing system.
To get started, we recommend picking the product you're launching next and writing out the four decisions — when, who, how many, and after sellout.
If you'd rather see the features first, check the SellRules overview page.
Features and pricing checked September 16, 2026, based on the Shopify App Store listing and the official guide.