To end a limited-time sale on Shopify automatically at a set time, enter the end date and time in an app that manages sales schedules. In the product settings of the Shopify admin, the only thing you can schedule is when the product gets published.
For example, say you sell a winter limited gift set for just 4 days, from November 27 through November 30.
| Phase | Starts | Buy button on the product page |
|---|---|---|
| On sale | November 27 at 0:00 | Your theme's “Add to cart” |
| Sales ended | December 1 at 0:00 | “Sales ended” (can't be bought) |
In the Shopify app SellRules, you enter these two dates and times in a “Coming soon” schedule and create it. A coming-soon schedule keeps the product unavailable until the sale start time and starts selling at that time, and you can enter the end date in the same schedule. Once it's created, the product page switches to “Sales ended” at 0:00 on December 1, so nobody has to open the admin late on the last night to unpublish the product.
What customers see
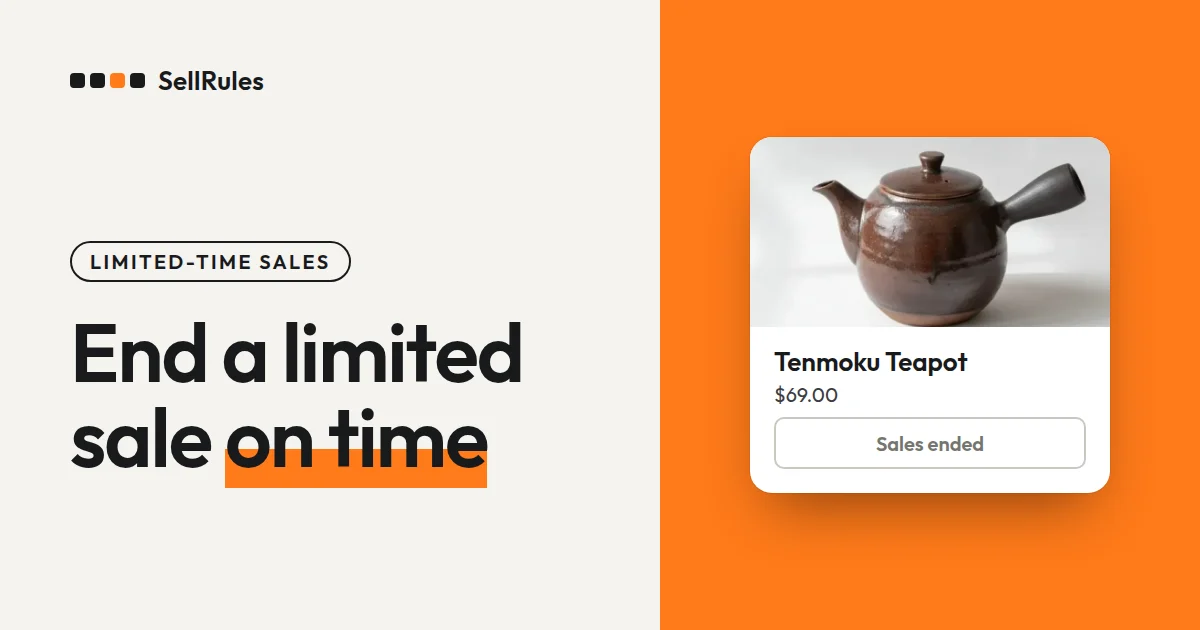
When the end date and time arrive, “Sales ended” appears where the buy buttons were on the same product page.
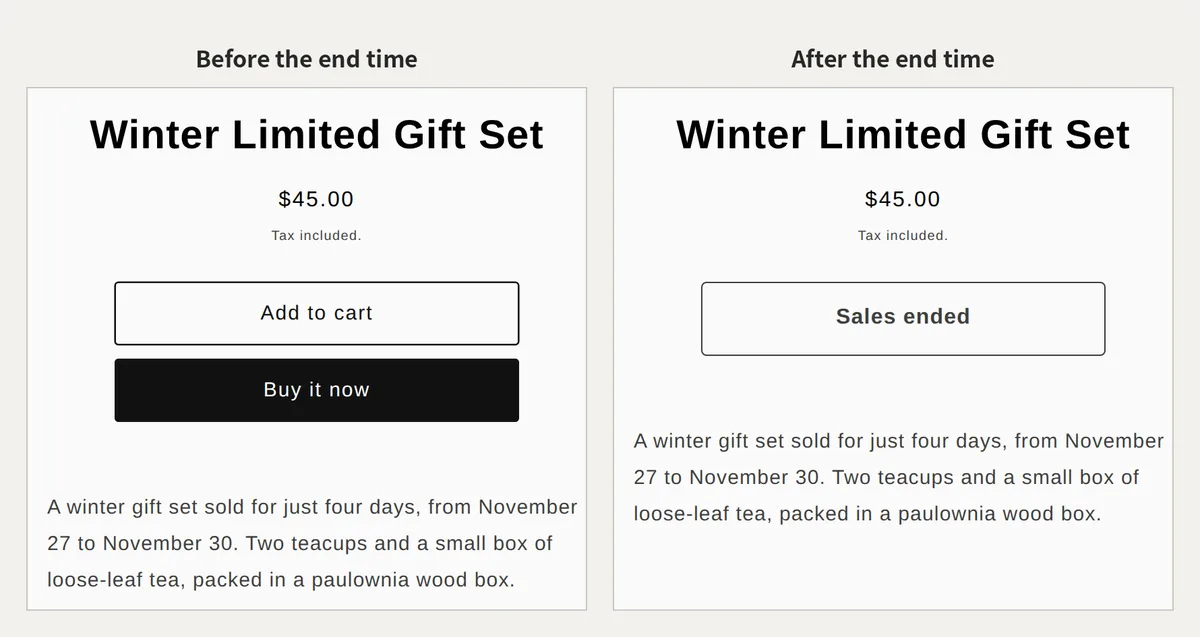
Customers no longer see “Add to cart” and “Buy it now”. A “Sales ended” button they can't click appears instead. The product page stays up, so visitors can tell the sale period is over.
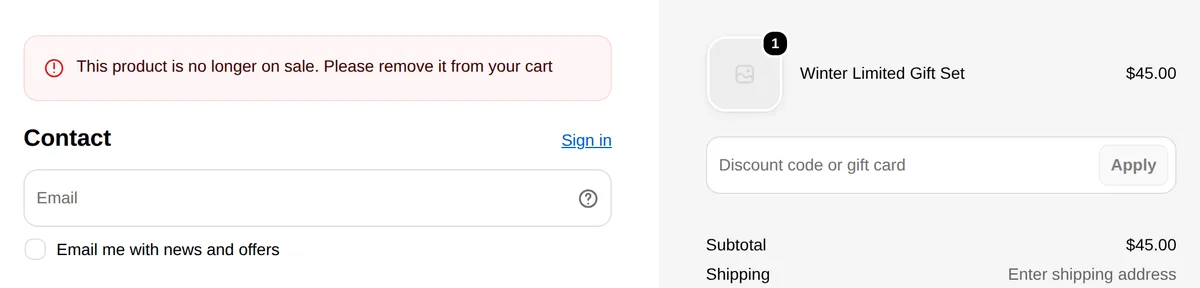
Customers who added the product to their cart before the end can't place an order either. When they go to checkout, they see the message below and can't continue to payment.
Choose one of 3 ways the product looks after the sale
What customers see after the sale depends on whether you keep the product page up, hide the page entirely, or keep selling the product and end only the discount.
| State after the end | What customers see | Setting |
|---|---|---|
| “Sales ended” display | The product page stays up, with “Sales ended” in place of the buy buttons | “Date regular sales end” in SellRules |
| Unpublished | The product no longer appears in your online store | “Date regular sales end” plus “Also switch Online Store publishing” |
| End only the discount | The product stays on sale, and only the discount ends | The end date of a Shopify discount (for a product that hasn't launched yet, the SellRules “Launch discount” also works) |
To hide the whole page, turn on “Also switch Online Store publishing” on the create screen. The product is published while the “Coming soon” display is showing and while it is on sale, and it is unpublished automatically once sales have ended.

If you turn this setting off or delete the schedule, the product keeps whatever publishing status it has at that moment.
How this differs from Shopify's built-in features
Shopify's built-in features vs. a SellRules coming-soon schedule
Shopify's built-in features
SellRules coming soon
Shopify lets you schedule the date and time a product is published, separately for each sales channel (Shopify Help Center, checked November 13, 2026). The product settings have no field for when the sale ends, so at the end time someone has to unpublish the product by hand.
If someone can open the admin at the end time and you only have a few products, the built-in features are enough. For a sale that ends overnight or on a weekend, enter the end date and time in SellRules.
How to set the end date and time in SellRules
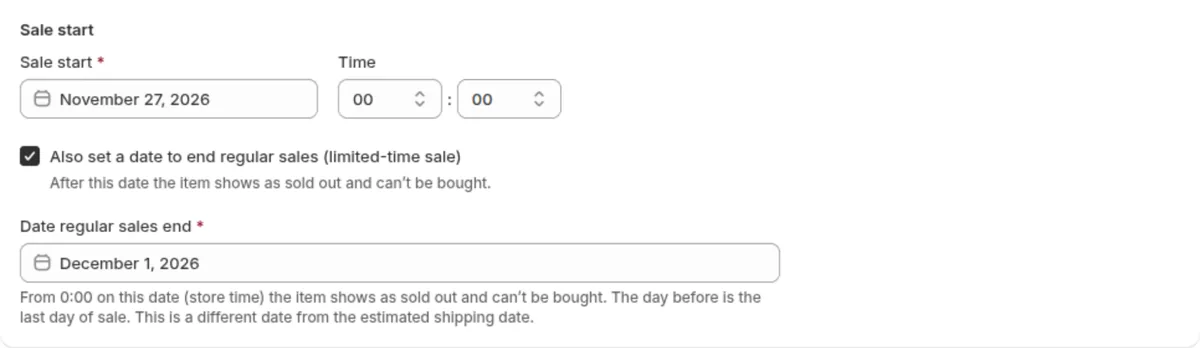
- In SellRules, go to “Sales schedules”, click “Create coming soon”, and select the product you are selling for a limited time.
- In “Sale start”, enter November 27 and the time 00:00.
- Check “Also set a date to end regular sales (limited-time sale)” and enter December 1 in “Date regular sales end”.
- To hide the whole page after the end, turn on “Also switch Online Store publishing”. To add a discount, turn on “Launch discount” under “Discounts”.
- Check the dates and times in the bar at the top of the screen, then create the schedule.
Sales end from 0:00 (store time) on the “Date regular sales end”. The help text on the screen also says “The day before is the last day of sale”, so enter the day after your last sales day.
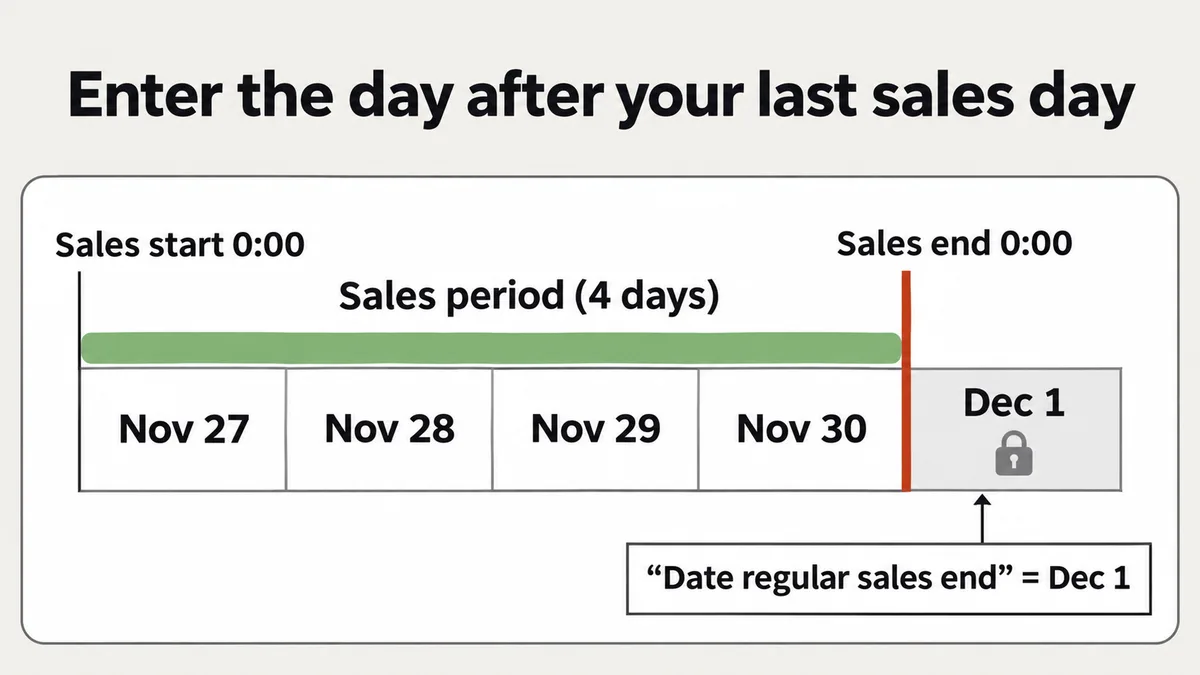
Keep these 3 points in mind when you enter dates and times.
- Enter dates and times in the time zone shown on the create screen in “Dates and times are saved in your store's time zone (…)”.
- “Sale start” has to be later than the time you create the schedule.
- On the create screen you can only pick the end date, not a time. To end partway through a day, for example at 18:00, open “Edit schedule” after creating the schedule, change the end time, and click “Save changes”.
Between creating the schedule and the sale start, the product page shows “Coming soon” and the product can't be bought.
Ending only the discount after a set period
If you want to keep selling the product and end only the discount after a set period, give a Shopify discount an end date.
In a Shopify discount, you can set when it ends with “Set end date” under “Active dates” (checked November 13, 2026). If you don't set an end date, the discount has no expiry.
For a product that hasn't gone on sale yet, you can match the discount period to the coming-soon schedule by turning on “Launch discount” under “Discounts” on the create screen. SellRules then applies the discount through a Shopify automatic discount from the sale start time until the “End date” you choose.
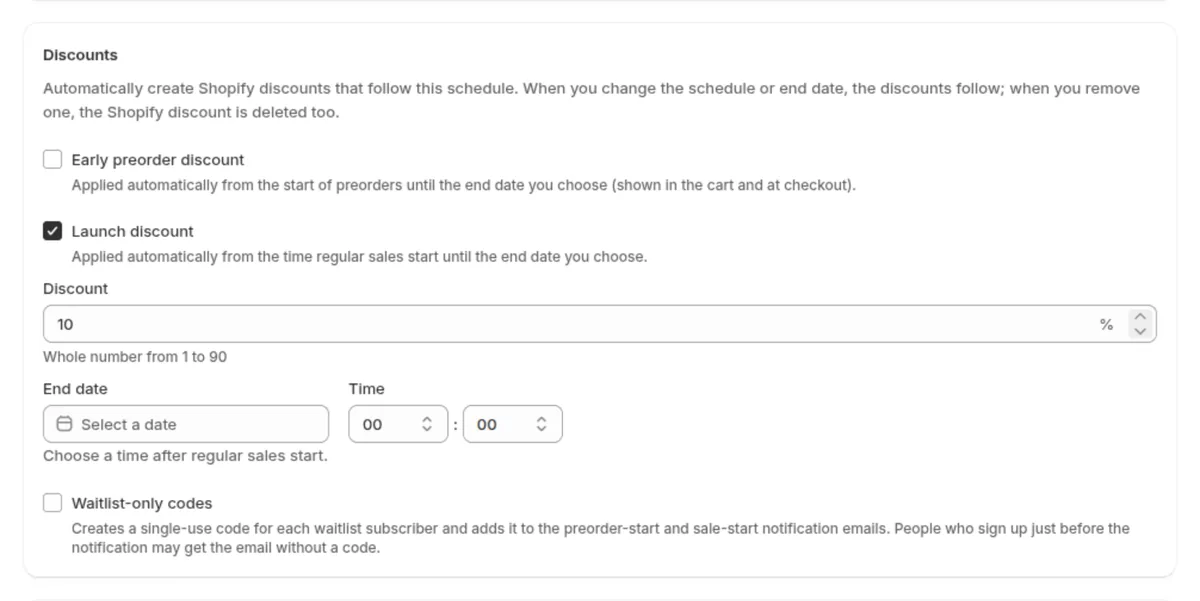
Enter the “Discount” as a whole number from 1 to 90. If you change the sale start, the discount start moves with it, and if you remove the discount from the schedule, the Shopify discount is deleted too.
Check before and after the end
Check these 3 things around the end date and time.
| When | What to check |
|---|---|
| Right after creating the schedule | In the “Sales schedules” list, the product's status and sale start date are correct. If you added a discount, the “Discounts” section in the schedule details says “Applied in Shopify” |
| The day before the end | In the schedule details, the end date and time are as planned |
| Right after the end | Open the product page in a new tab and confirm “Sales ended” appears |
A page that was already open before the end date and time also changes to “Sales ended” once it is reloaded. Items added to the cart before the end are stopped at checkout, as shown above.
If the sale doesn't end the way you expected, check the following in this order.
| Symptom | Cause | Fix |
|---|---|---|
| The sale ended at 0:00 on the last day | The last sales day was entered as the “Date regular sales end” | Change it to the following day |
| The sale ended a few hours earlier or later than planned | The store's time zone isn't the region you assumed | Recalculate the time using the time zone shown on the create screen |
| You extended the sale, but the discount ended early | The “End date” of the “Launch discount” wasn't changed | Move the discount's “End date” later as well |
Extending the sale or stopping it early
To extend the sale, open “Edit schedule”, move the end date and time later, and click “Save changes”. Even if sales have already ended, the product goes back on sale as soon as you save, and the buy buttons reappear on the product page. If you added a “Launch discount”, move its “End date” later as well.
To stop earlier than planned, click “Pause sales” in the schedule details. Your settings stay in place and only purchases stop. The product page stays visible and shows “Sales ended”.
Pricing
On the Free plan, you can use “Coming soon” for 1 product. Try it on the next product you sell for a limited time by creating a schedule with an end date.
To sell more products for a limited time, switch to the Launch plan (US$7.99 per month). You can install SellRules from the Shopify App Store, where you can also check the pricing and trial terms.
Frequently Asked Questions
Can I change the “Sales ended” text to a message about what's next?
Yes. In SellRules, go to “Settings”, open “Button and label text”, and enter something like “Sales are over for this year” in “Sales ended message”.
How do I restart a sale I paused?
Click “Resume sales” in the schedule details. The status is decided by the date and time at the moment you resume: before the end date and time, the product goes back on sale; after it, it stays “Sales ended”.
Is it the same setting when I want pre-orders to close on a set date?
Pre-order schedules use a similar setting: choose “End sales and show "Sales ended"” under “When the pre-order ends” and enter a “Date sales end”. That date also switches to “Sales ended” from 0:00 on that day.
Related articles:
- Planning dates and quantities for a launch or a holiday sale together: how to plan a product launch or holiday sale
- When sales start, and switching from pre-order to regular sales: Switch to regular sales automatically at launch
- Choosing between a quantity limit and a time limit: How to set rules for early-access and limited sales
- Collecting notification sign-ups before launch: How to collect sign-ups before launch
- Limiting a limited item to 1 per customer: How to set a “1 per customer” limit
The gift set and the schedule are examples for explanation.