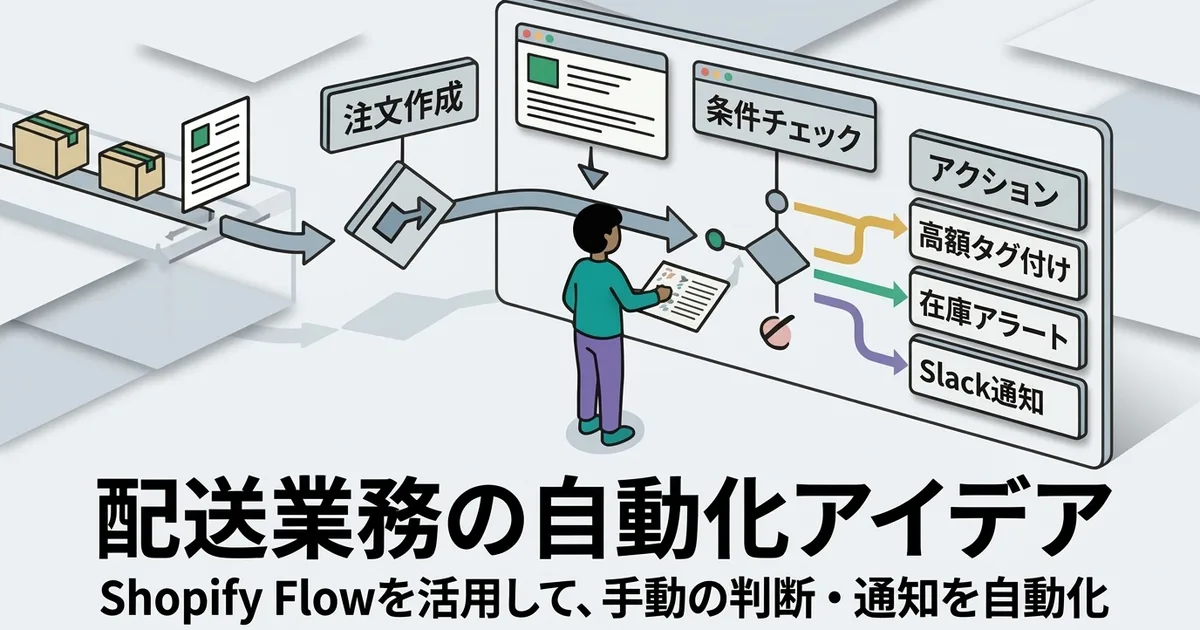

Ask AI to Prepare Your Click Post Shipments: How to Connect ChatGPT and Claude and Use Them
"Which orders haven't shipped yet today?" "Make a CSV from these 5." The steps you used to click through in the Shopify admin before every shipment can now be requested in a conversation with an AI.
In 2026, the developer JizaiDev added AI connection (MCP) to the Shopify app Instant Shipping! for Click Post. AI can handle the preparation for shipping. Registration, which sends the customer a shipping notification, only happens after the owner approves it in the admin.
AI Prepares the Shipment, and the Store Owner Confirms the Notification
With AI connection you can check unfulfilled orders, create the Click Post CSV, build tracking number registration candidates from label PDFs, and register what the owner approved. Anything you do on the Japan Post site is outside what the AI can do.
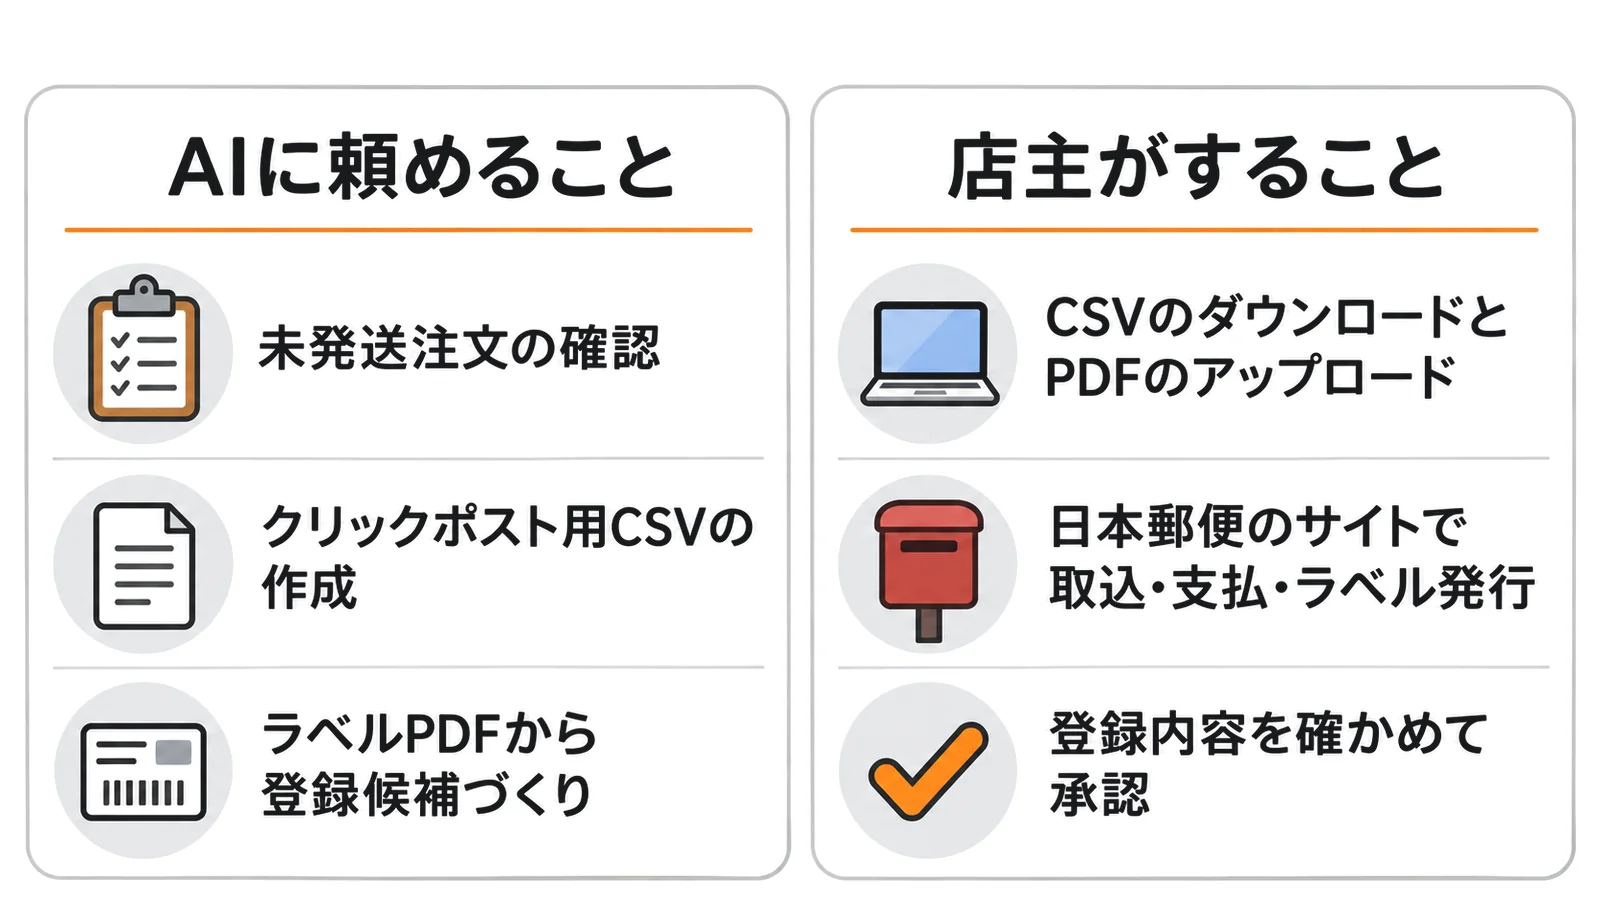
MCP is a common standard that lets an AI service call an external app. The AI can only do what the app has set up for it in advance.
| Task | Can you ask the AI? | Notes |
|---|---|---|
| Check unfulfilled orders | Yes | Addresses and names are not returned |
| Create the Click Post CSV | Yes | Up to 40 orders at a time. You can download it once, within 5 minutes, in the admin |
| Build registration candidates from a label PDF | Yes | You upload the PDF to a page in the admin |
| Register tracking numbers and notify customers | Yes, after approval | Only what the owner reviewed and approved in the admin |
| Import, pay, and issue labels on Click Post | No | You still do this in the browser |
Creating the CSV and matching tracking numbers use the same processing as the app's regular screens. Whether you ask the AI or work from the regular screens, the CSV and the matching results come out the same.
Before You Connect, Check That You Meet Three Requirements
To use AI connection, these three requirements must be in place.
- You are the store owner: Only the store owner's account can grant or disconnect a connection and approve tracking number registration. A staff account can't connect, so if staff handle your shipping, write down the steps on the regular screens, as in How to Create a Shipping Manual to Delegate Fulfillment to Staff and Partners.
- The app plan is active: Without an active plan you can't get past the permission screen. If the plan lapses after you connect, requests such as checking orders are also refused.
- Your AI service supports custom connections: The requirements below are what we confirmed in each service's official documentation on November 20, 2026.
| AI service | Where to add it | Requirements in the official documentation |
|---|---|---|
| Claude | On Pro and Max, "Customize" > "Connectors" > "+ Add" > "Add custom connector" | Available on Free, Pro, Max, Ultra, Team, and Enterprise. Free is limited to one. On Team, organization owners (Owners, Primary Owners) add it under "Organization settings" > "Connectors". On Enterprise, owners and custom roles with the permission add it |
| ChatGPT | On the web version, "Plugins" > "+" > "Add custom MCP server" | You can choose "OAuth" for authentication. The documentation lists no eligible plans, and you may not be able to add one depending on workspace permission settings or security restrictions (including Lockdown) |
The screen names follow the English wording in the official documentation and vary by display language. The eligible plans can also change at each company's discretion. If you can't find where to add it, check the current requirements in Claude's guide to custom connectors or ChatGPT's guide to custom MCP servers.
Register the Server URL, Then Grant Permissions in the Shopify Admin
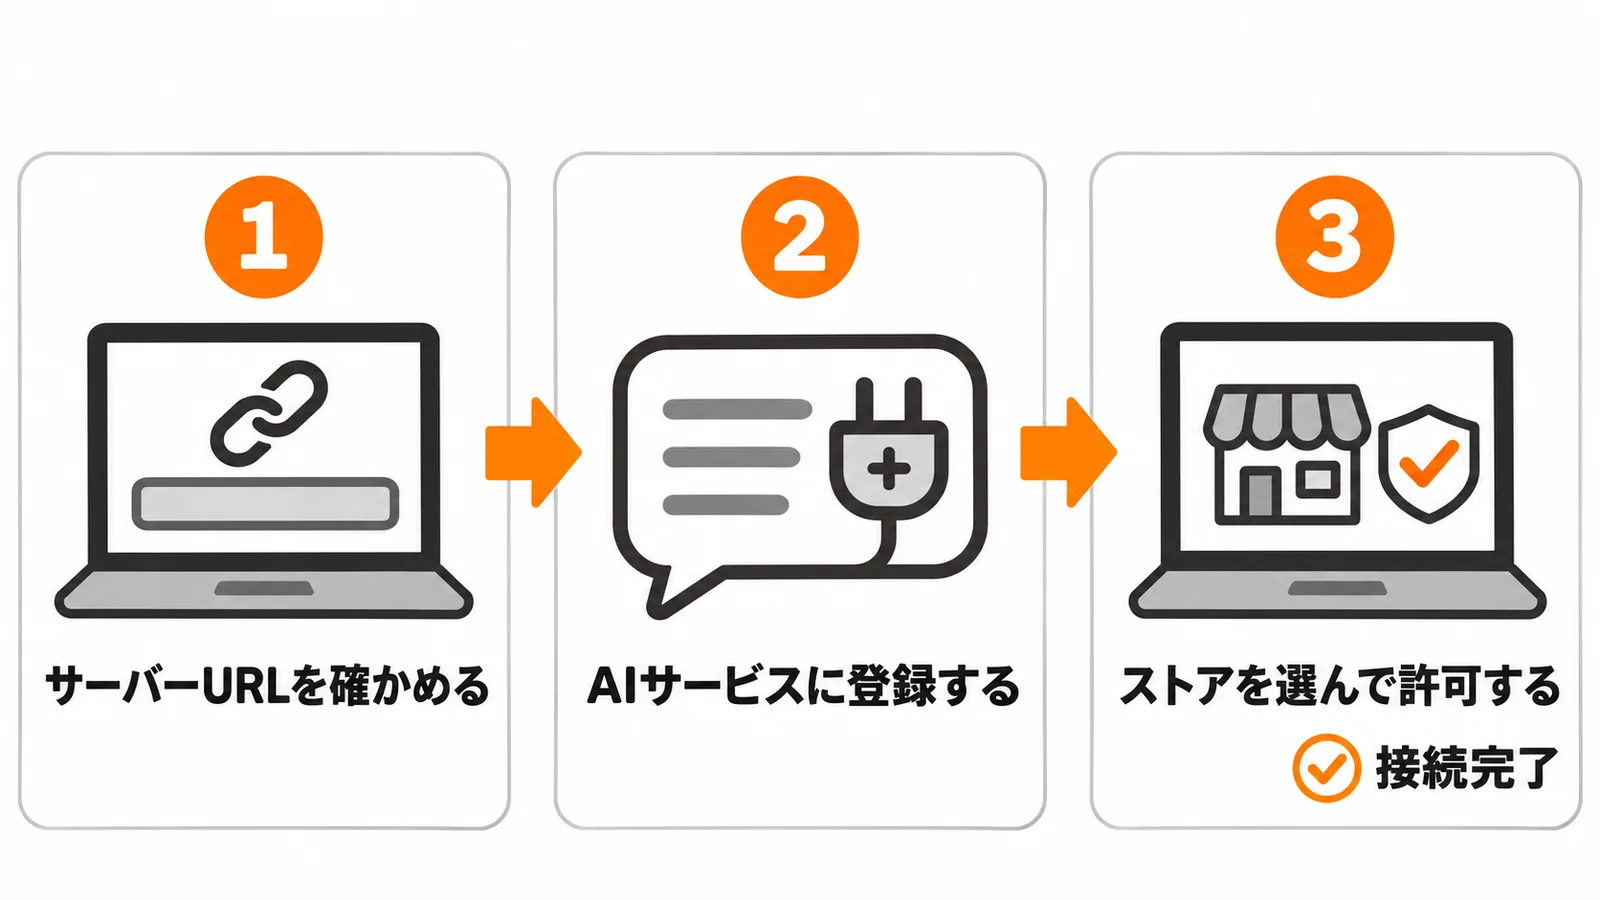
Connecting takes three stages: register the server URL in your AI service, choose the store to connect, and grant permissions in the Shopify admin. You never need to copy an API key or password into the AI conversation.
Have the AI Walk You Through the Setup
If you already use ChatGPT or Claude, paste the text below into it and it can guide you through the connection setup itself, one step at a time. The AI only guides you. You press the buttons and grant permissions in the Shopify admin yourself.
Copy the server URL from "Connections to AI Services" under "Manage AI Connections" and put it into the text. Screen names can change when the AI service updates, so if what you see differs from the guidance, tell the AI what the screen looks like.
I'm about to connect the Shopify app "Instant Shipping! for Click Post" to this AI service over MCP. I'm not used to this kind of setup, so please guide me through one action at a time and wait until I say "done" before moving on. If a screen name differs from your guidance, I'll describe what I see, so please adjust to that.

My situation:
- I'm the store owner, and the app plan is active
- Server URL: (paste the URL shown under "Connections to AI Services" in "Manage AI Connections")
- The AI service and plan I'm using: (for example: ChatGPT on the web, Claude Pro)

Steps I'd like you to guide me through:
1. Open the place where I add a custom MCP server. In ChatGPT on the web: "Plugins" > "+" > "Add custom MCP server". In Claude on Pro and Max: "Customize" > "Connectors" > "+ Add" > "Add custom connector".
2. Enter the server URL and choose "OAuth" for authentication. In ChatGPT, change "Registration method" under "Advanced OAuth settings" to "Dynamic Client Registration (DCR)" (if I leave it as is, it stops with "invalid_client"). In Claude, if it stops partway, try "Register automatically" under "OAuth client" (it hasn't been confirmed that this works).
3. On the "Connect Click Post to AI" page, enter the store's domain in "Shopify store to connect" and press "Verify store and continue".
4. In the Shopify admin, review the list of permissions and grant them. If I want to ask for tracking number registration too, don't uncheck "Register approved tracking numbers".
5. Once connected, test it by asking "Check 5 unfulfilled orders".

What I need you to follow:
- Don't ask me for an API key or password. This connection doesn't use them.
- Don't pretend you operated the screen for me. If you don't know something, say you don't know.
- I'll grant permissions, disconnect, and approve tracking number registration myself in the Shopify admin.
The same steps are written out in 1 to 3 below, so you can also go through them on your own.
1. Find the Server URL in the Admin
Open the app in the Shopify admin and choose "Manage AI Connections" from the left menu. The server URL to register in your AI service appears in the "Connections to AI Services" section of that screen.
2. Register It in the AI Service
In ChatGPT, open "Add custom MCP server" from "Plugins" > "+" on the web version, enter the server URL, and choose "OAuth" for authentication. Then open "Advanced OAuth settings" and change "Registration method" to "Dynamic Client Registration (DCR)". If you leave the method that's selected at first, it stops with an "invalid_client" error before you reach the permission screen. On some screens this item is called "Create MCP App" instead of "Add custom MCP server".
In Claude, use "Add custom connector" and enter a name (for example, Click Post) and the server URL. However, we haven't yet confirmed a connection from Claude at the time of publishing. If it stops partway, try selecting "Register automatically" in the "OAuth client" settings. We haven't confirmed yet whether that method works either.
3. Choose Your Store and Grant Permission as the Owner
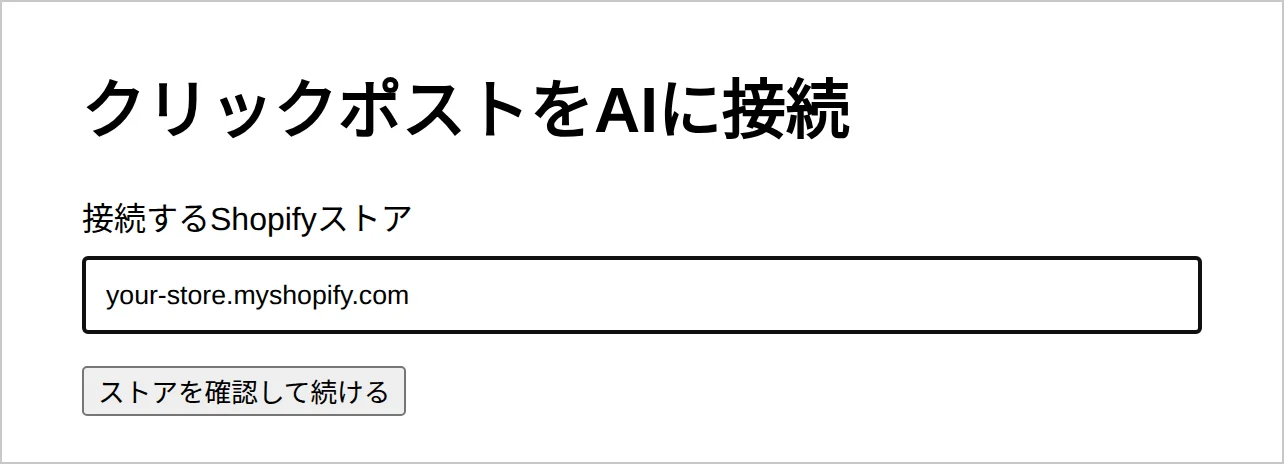
When you start the connection from the AI service, the "Connect Click Post to AI" page opens. Enter your store's domain in "Shopify store to connect" and press "Verify store and continue".
The Shopify admin then opens with the permissions the AI service requested already checked. If there are permissions you don't need, you can uncheck them before granting.
| Permission name | What the AI becomes able to do |
|---|---|
| "Check connection and tools" | Check that the connection works and see which tools are available |
| "View order information" | See the minimum order information needed to narrow down what to ship |
| "Create Click Post CSV" | Create a CSV, including delivery addresses, from the orders you select |
| "Prepare tracking number registration" | Read the label PDF and create registration candidates and an approval screen |
| "Register approved tracking numbers" | Register only the shipping notifications approved in the admin |
| "View operation results" | See the status of registrations made through this connection |
You can check the permissions you granted under "Connections & History" in "Manage AI Connections". If "Register approved tracking numbers" isn't included, reconnect before you upload a PDF, because registration can only be requested through the same connection that created the candidates.
After you review and grant the permissions, you return to the AI service. As "Manage AI Connections" suggests, first ask it to "Check 5 unfulfilled orders". If the connection works, you get back details such as the numbers and fulfillment status of your unfulfilled orders. Addresses and names are not returned.
Check Unfulfilled Orders and Create the CSV in a Conversation
You can check unfulfilled orders and get as far as creating the CSV just by talking to the AI. Only the final download is done by the owner, in the Shopify admin.
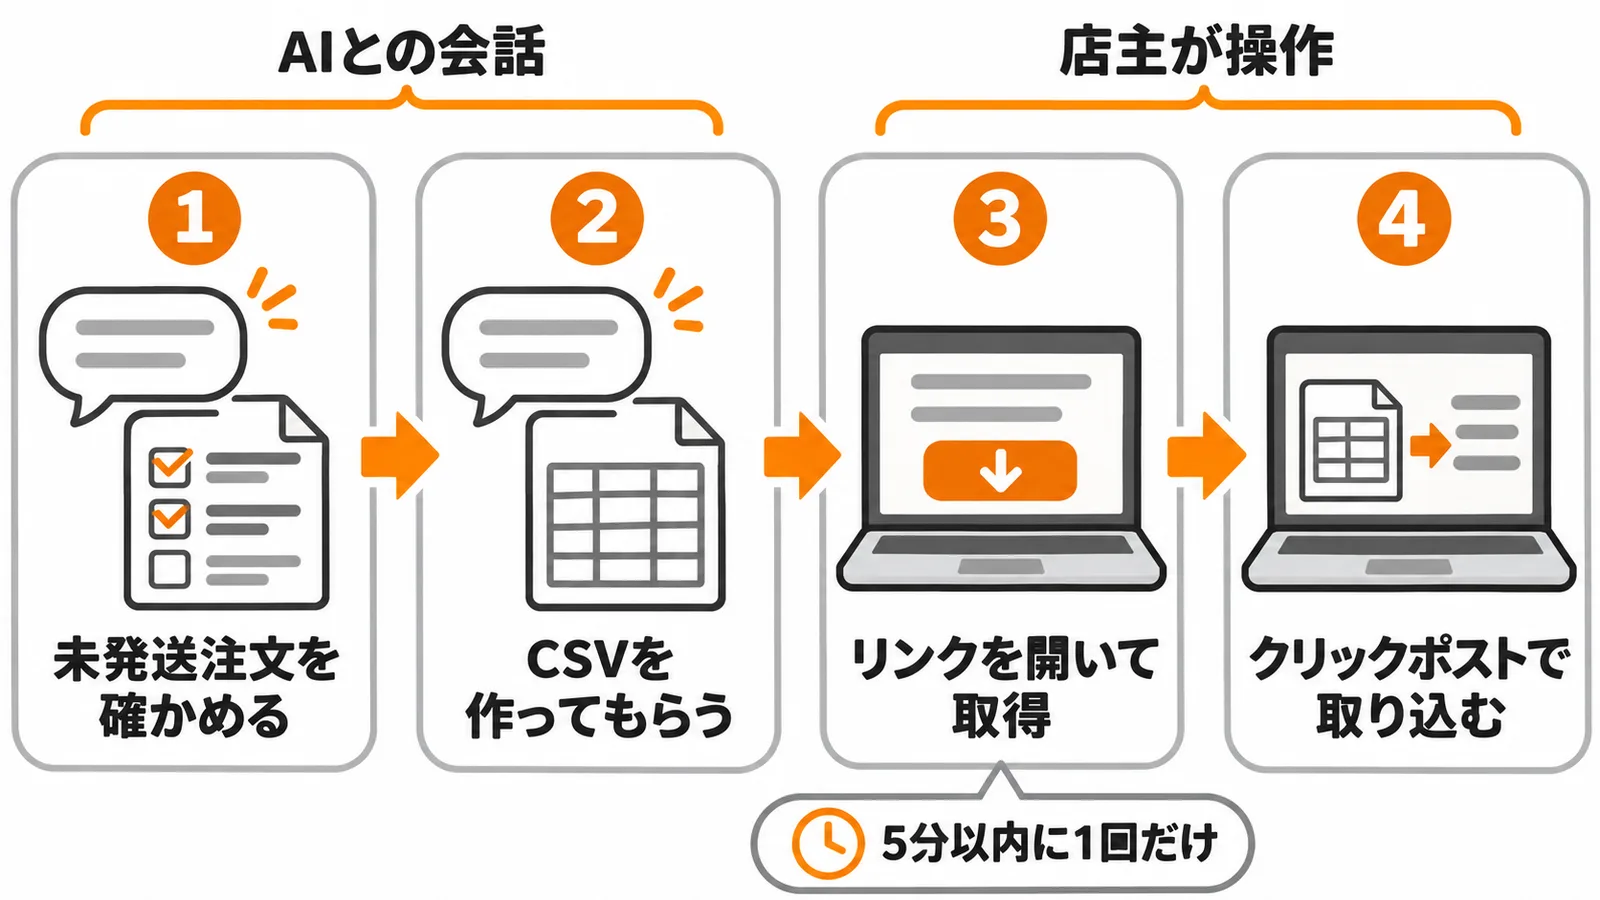
For example, you can ask like this in a conversation.
- "Show me the 10 oldest unfulfilled orders"
- "Create a Click Post CSV for 5 of those, #1021 to #1025"
In ChatGPT, when you ask it to create a CSV or register tracking numbers, it asks you to confirm before running. Check that the details are right, then allow it.
When the AI creates the CSV, it returns a link to the download page in the admin. Open the link and press the button to download the file. Because this CSV includes delivery addresses, its contents are never sent into the AI conversation.
The download follows these rules.
- You can download it once, within 5 minutes of its creation
- Just opening the page does not use it up; it is used when you press the button
- If the link has expired, was already used, or the connection dropped, ask the AI to create it again
You can create up to 40 orders at a time. If you want to send 41 or more at once, ask in batches of 40. Import the CSV you downloaded on the Click Post site, as before.
Tracking Number Registration from a Label PDF Runs Only After You Approve It
Registering tracking numbers from a label PDF takes four steps: upload the PDF, review the candidates, approve, and ask for registration. Because it sends the customer a shipping notification, the AI never goes ahead on its own judgment.
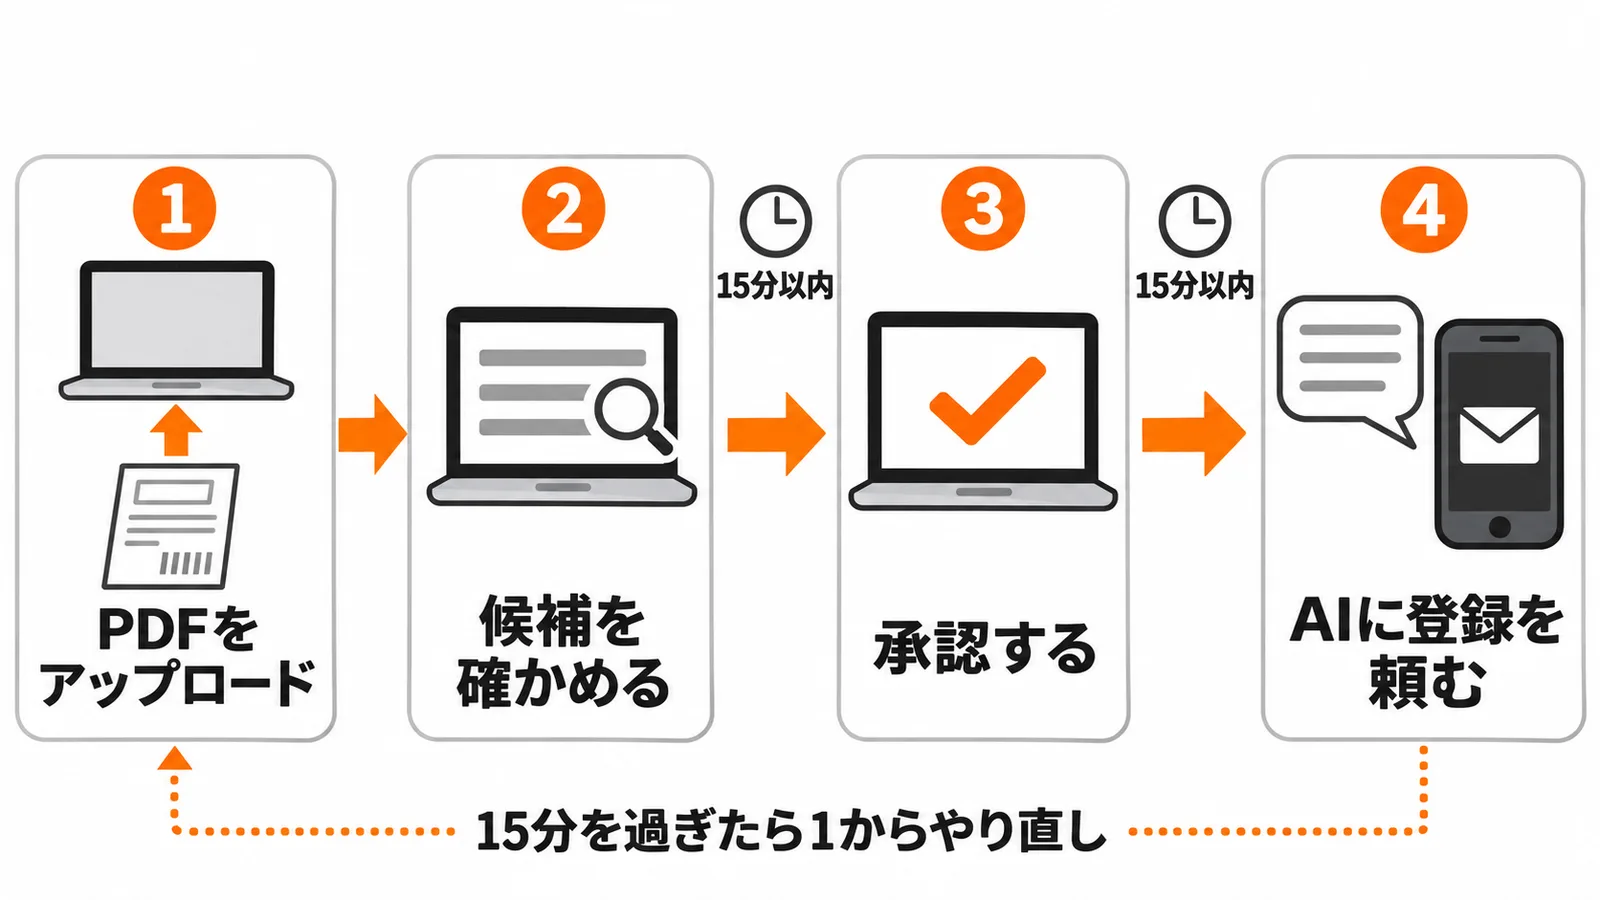
Upload the PDF to the Admin Page
When you tell the AI "I want to register tracking numbers from the label PDF I issued," it shows you a link to an upload page. Attaching a file in the AI chat does not send it automatically, so always choose the PDF and upload it from this page.
- It accepts 1 or 2 PDFs at a time, each up to 10 MB
- It only accepts files from your computer (you can't enter a URL or have it fetch an external file)
- The upload page stops working 15 minutes after it is created
After the upload, go back to the AI conversation and say "Continue with the preview." The AI then reads the PDF and creates registration candidates. It can read up to 80 labels at a time.
Review the Candidates and Approve
Next, open the "Tracking number registration" page the AI points you to and check that the order, tracking number, and item quantities are correct.
Select the candidate order (if there's only one candidate, it is already selected) and press "Save selection and refresh latest status". Pressing this button pulls the order and quantity details from Shopify again, so look the refreshed details over once more.
You have to finish approving within 15 minutes of pressing "Save selection and refresh latest status". After that, pressing the button again won't refresh the details. In that case, ask the AI to create the upload page again and start over from uploading the PDF.
If everything is right, check "I understand that a notification will be sent to the customer." and press "Review displayed details and approve". At this point, nothing has been registered in Shopify yet.
Ask the AI to Register
Once you've approved in the admin, tell the AI "I've approved it, please register it" within 15 minutes. After 15 minutes the approval can no longer be used for registration, and you can't approve it again. If it has expired, ask the AI to create the upload page again and start over from uploading the PDF.
If you ask within that time, only what you approved in the admin is registered in Shopify as a fulfillment, and the customer receives a shipping notification. If the quantity you approved covers every item in the order, the order becomes fulfilled and disappears from the unfulfilled list.
We confirmed registration in September 2026 on a test store, using one fictional label PDF. We haven't yet confirmed the flow of asking for registration from ChatGPT.
If the Result Is Unknown, Check Shopify Before Sending It Again
If the connection drops partway through registration, you may end up in an "unknown result" state where you can't tell whether it was registered. In that case, don't ask the AI to run the same registration again.
When the "Tracking number registration" page shows "Some items have an unknown result", first open the order in the Shopify admin and check whether it is marked as fulfilled. If the same tracking number is registered twice, the customer could get the notification more than once.
If only some orders were registered, don't ask the AI again for the ones that already succeeded or whose result is unknown. If you want to check the status from the AI side, you can ask "Show me the status of that last registration."
When You Stop Using It, Disconnect It from "Manage AI Connections"
You can disconnect an AI from "Connections & History" in "Manage AI Connections" at any time. A disconnected connection can no longer operate the app.
The list shows the granted permissions, status, and expiry for each connection. If there's an AI service you no longer use or a connection you don't recognize, press "Disconnect". If you want to use it again later, connect again from the AI service.
If you can't connect, check the following in order.
| Symptom | What to check |
|---|---|
| You can't get past the permission screen | Whether you're logged in to Shopify with the owner account, and whether the app plan is active |
| "This authorization request has expired" appears | Start the connection again from the AI service screen |
| ChatGPT shows "invalid_client" | Whether you set the OAuth registration method to "Dynamic Client Registration (DCR)" |
| You can't connect from Claude | Try selecting "Register automatically" (connecting from Claude hasn't been confirmed yet) |
| The AI refuses when you ask about orders | Whether the connection was disconnected or expired, and whether the plan lapsed after you connected |
| The AI service has no option to add one | Whether your plan or workspace settings allow custom connections |
Frequently Asked Questions
Q. Can I still use the app if I don't connect an AI?
Yes. AI connection is just another way into the app, so you can still create CSVs and register tracking numbers from the "Label Issue" and "Shipping Notification & Tracking" screens as before.
Q. Can a staff account connect an AI?
No. Only the store owner can grant or disconnect a connection and approve tracking number registration. If staff handle your shipping, write up the work on the regular screens as a manual.
Q. Does the AI get customers' addresses and names?
No. When the AI looks at your order list, addresses and names are not returned. The contents of the CSV, which includes delivery addresses, also never pass through the AI conversation; the owner downloads it once from the Shopify admin.
Q. Can the AI send shipping notifications to customers on its own?
No. Only the order, tracking number, and item quantities you reviewed and approved in the admin are registered. Nothing you haven't approved is ever registered.
Q. Will the AI also apply, pay, and issue labels on the Japan Post site?
No. Importing the CSV, paying, and issuing labels on the Click Post site are still done by the shop owner in the browser.
Summary
With the AI connection in Instant Shipping! for Click Post, you can check unfulfilled orders, create the Click Post CSV, and build registration candidates from label PDFs, all in a conversation with an AI. Registering the tracking number, which sends the customer a shipping notification, is run by asking the AI only after the store owner reviews and approves it in the admin. Only what you approved is applied.
You can add the app from Instant Shipping! for Click Post on the Shopify App Store. After installing, start the connection from "Manage AI Connections" in the left menu.
If you want to read more about shipping work and automation, these articles are also worth a look.
- How to read CSV errors: Fix Click Post CSV Errors: Address Fields, Encoding, and Postal Codes
- Reading label PDFs and matching candidates: Register Click Post Tracking Numbers in Shopify: Match Orders from Label PDFs
- How the customer's notification email arrives: What Happens When You Sync a Tracking Number to Shopify: How Shipping Notification Emails Work
- Automating shipping work by condition: Ideas for Automating Shipping Operations with Shopify Flow
- The whole flow from order to shipping notification: Shopify × Click Post Shipping Guide: The Flow from CSV Export to Tracking Registration