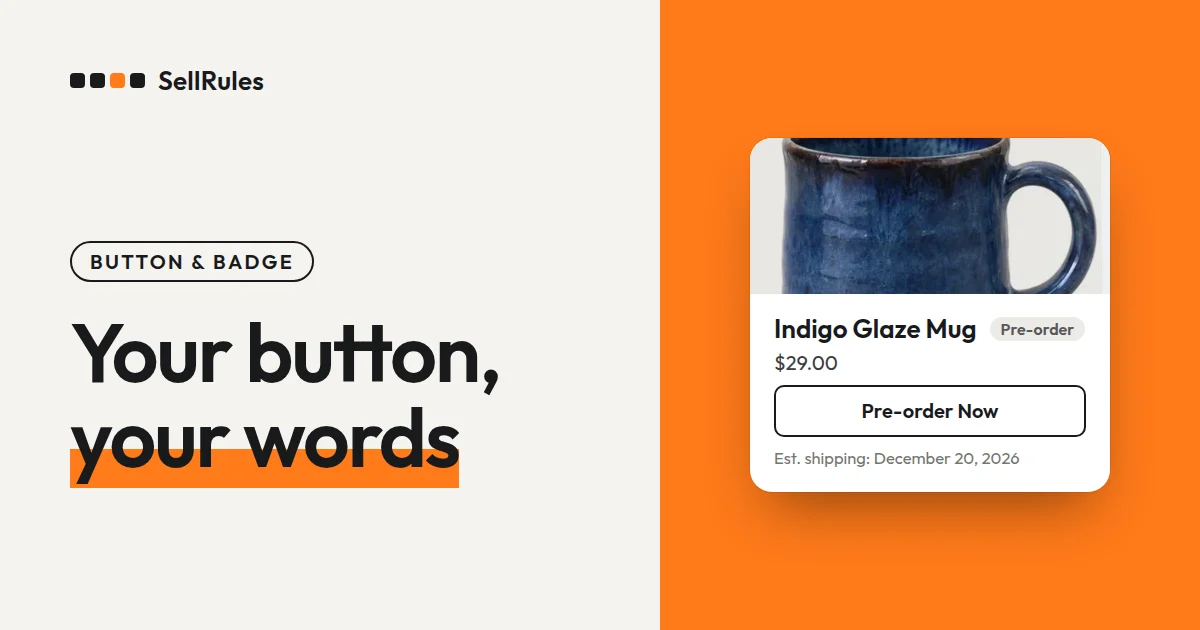
To change the text on the pre-order buy button and badge on Shopify, go to “Settings” → “Button and label text” in SellRules, type your wording into the fields you want to change, and save.
If you haven't changed anything, your store shows the text built into SellRules: “Pre-order Now” on the button and “Pre-order” on the badge. If your store calls them reservations, use the same word on the button and badge, such as “Reserve”. Your product pages then match the wording in your announcements and emails.
On this screen you can change:
- The text in 14 places customers see, such as the pre-order, made-to-order and coming soon badges, the buy button, the back-in-stock form and the cart line items
- Translations of that text (entered on a tab for each language)
- The color of the pre-order and made-to-order buy buttons
- Badge position, shape, text size and colors (Launch plan)
What customers see
The screenshots below show the product card and product page for the same mug. On the left nothing has been changed. On the right, the badge says “Reserve” and the button says “Reserve now”, the badge shape is a tag, and both the badge and the button are navy.
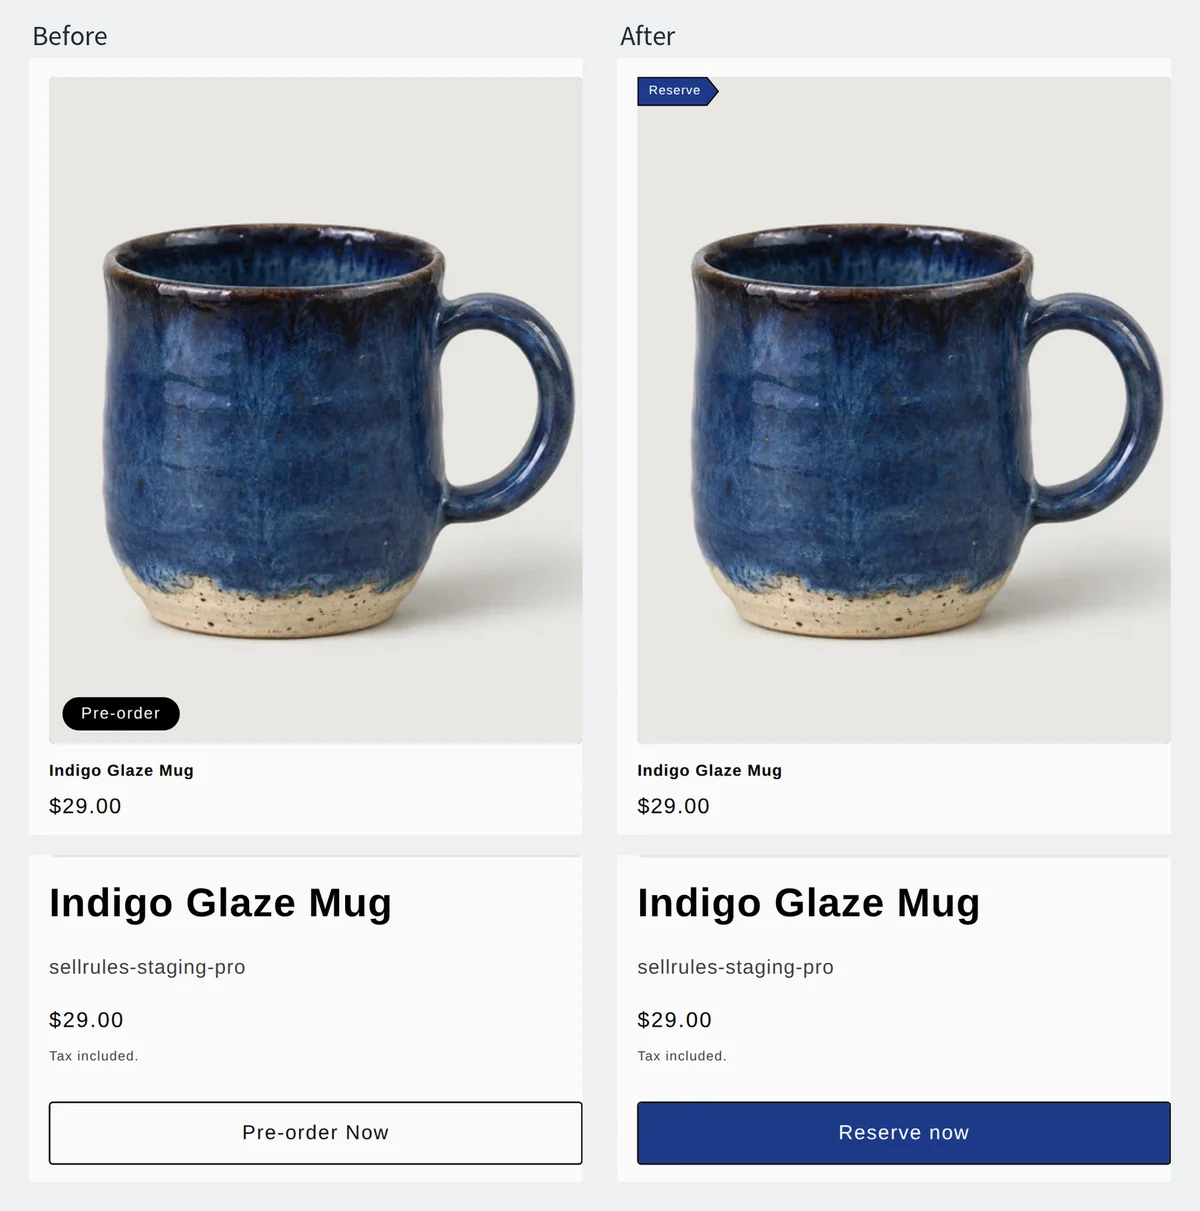
Badges appear on the product card image wherever products are listed, such as collections, search results and related products. They don't appear on the large product image on the product page. There, the text and color of the buy button tell customers the item is a pre-order.
The 14 pieces of text you can change
The fields on the “Texts” tab are split into 5 groups by where the text appears. Each field also has a note underneath saying where it shows up.
| Group | Fields | Where it appears |
|---|---|---|
| General badge settings | Pre-order badge, Made-to-order badge, Coming soon badge | The product card image in product lists |
| Product page buttons | Pre-order button, Made-to-order button, Get notified button | The buy button on the product page and the submit button of the back-in-stock form |
| Back-in-stock sign-up form | Email input placeholder, Sign-up complete message, Intro text above the form | The back-in-stock form on the product page |
| Cart and checkout labels | Pre-order line item label, Made-to-order line item label | Under the product name in the cart, at checkout and in order details |
| Other | Sales ended message, Coming soon message, Cart: not on sale yet warning | Shown in place of the buy button, and on the item's line in the cart |
Line item labels stay on the order's line items, so the same wording also shows in the order details in your Shopify admin.
How this differs from editing Shopify's default theme content
Shopify's default theme content vs. “Button and label text” in SellRules
Editing Shopify’s default theme content
“Button and label text” in SellRules
Shopify has a built-in way to change the wording in your store. In the admin, go to “Online Store” → “Themes”, click “…” on your theme, and open “Edit default theme content” (Shopify Help Center, checked November 13, 2026).
If you change “Add to cart” there, the button text changes on every product, including regular ones. You can only edit your store's default language that way. Other languages are translated with an app such as Translate & Adapt.
Text you enter in SellRules shows only on pre-order, made-to-order and coming soon products. Regular products keep the theme's “Add to cart” wording.
How to set it up in SellRules
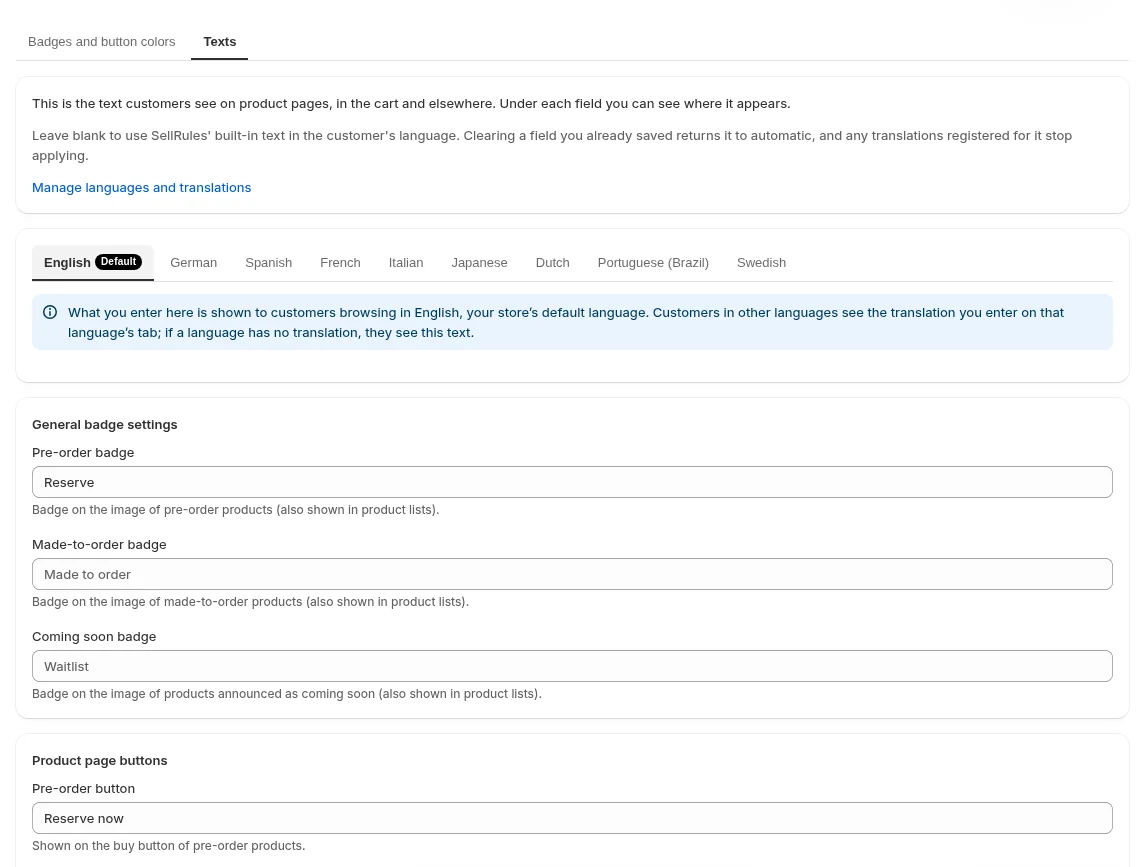
Before you start, check under “App embeds” on the left side of the theme editor that “SellRules” is turned on. If it's off, the buttons and badges in your store won't change, even after you save on this screen.
- In SellRules, go to “Settings”, click “Edit and translate text” under “Button and label text”, and open the “Texts” tab.
- On the language tab marked “Default”, type your wording into the fields you want to change. Any field you leave blank shows the text built into SellRules, in the customer's language.
- Select the tab for each other language your store sells in and enter translations in the same fields. In a language with no translation, customers see the text you entered on the default language tab.
- Click “Save”.
If you enter “Reserve” only on the default language tab, customers browsing in Spanish or French see “Reserve” too. Add a translation for each language your store sells in.
Change the button and badge colors
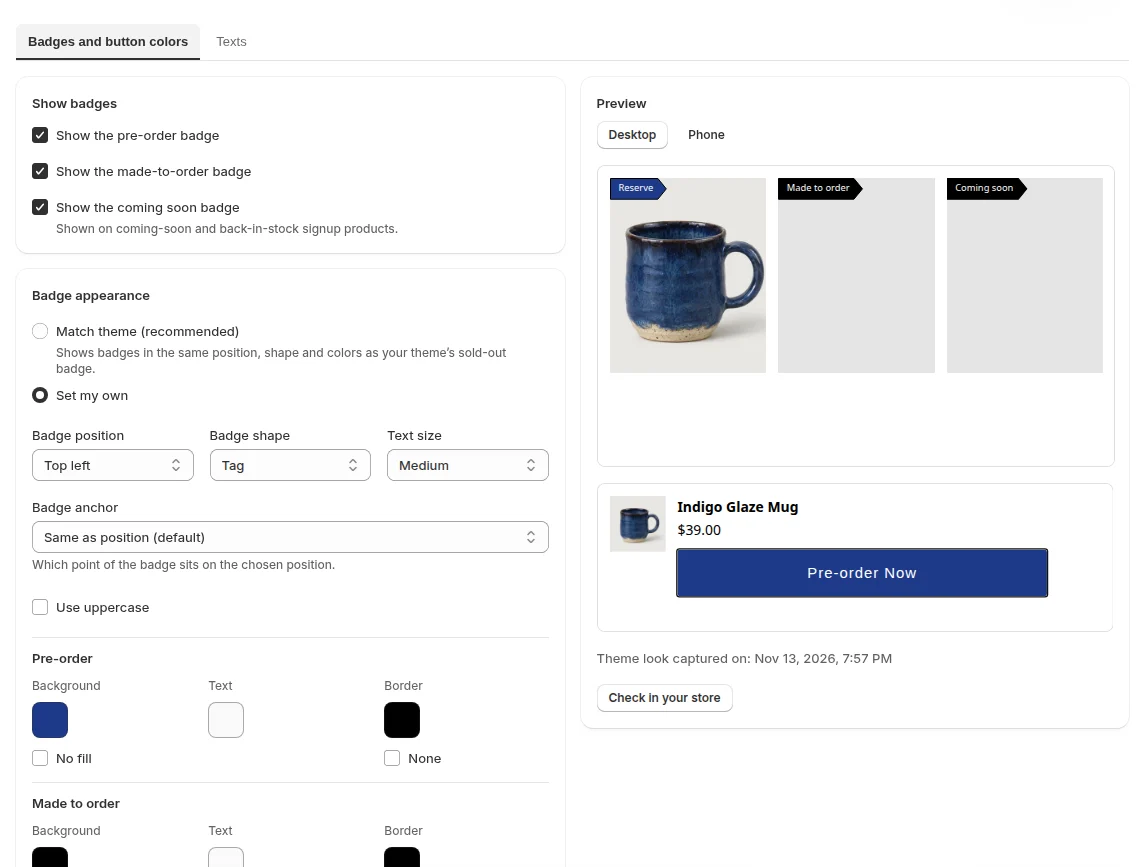
Change colors on the “Badges and button colors” tab of the same screen.
- Under “Product page button”, choose “Change colors” and pick the background and text colors. If the combination is hard to read, a contrast warning appears.
- Under “Badge appearance”, choose “Set my own” and pick the “Badge position”, “Badge shape” and “Text size”. Then pick the background, text and border colors for pre-order, made-to-order and coming soon badges.
- Check how it looks on “Desktop” and “Phone” in the “Preview” on the right, then click “Save”.
Unchecking a box under “Show badges” hides that type of badge. For example, to show no badge on coming soon products, uncheck “Show the coming soon badge”.
Check the result in your store
After you save, click “Check in your store” to open your store and look at these pages.
| Page to open | What to check |
|---|---|
| A collection with a pre-order product | The text, position and color of the badge on the product card image |
| The product page of a pre-order product | The text and color of the buy button |
| A cart with a pre-order product in it | The line item label under the product name |
| Your store in another language | That the translated text appears |
If something didn't change the way you expected, check these in order.
| What you see | Cause | Fix |
|---|---|---|
| Neither the button nor the badge changed | The “SellRules” app embed is off | Turn it on in the theme editor and save |
| Customers in another language see your default-language text | That language's tab is blank | Enter a translation on that language's tab and save |
| Badge position, shape or colors don't save | You're on the Free plan | Switch to the Launch plan |
| Badge colors don't change | The badge shape is still “Match theme” | Choose a shape and save |
| Colors in the preview and your store don't match | Your theme's look hasn't been captured yet | Open your store once with “Check in your store” |
Pricing
Changing and translating text, button colors and turning badges on or off are available on every plan, including Free. Start on the Free plan: put your own wording on the pre-order button and the pre-order badge, then check it on a product page and in a product list.
Saving badge position, shape, text size and colors requires the Launch plan (US$7.99 per month). You can try anything in the “Preview” on the Free plan, so you can find a shape and colors that suit your theme before you switch. SellRules is available on the Shopify App Store, where you can also check pricing and trial terms.
Frequently asked questions
How do I change the text back to the default?
Clear the field on the “Texts” tab and save. That field goes back to the text built into SellRules, and any translations you entered for it in other languages stop being used. To reset everything, click “Reset all to automatic” and save.
What happens to the button colors I set in the theme editor?
The first time you save on the “Badges and button colors” tab, the badge and button colors you set in the theme editor are replaced by the values on this screen. Before you save, use “Check in your store” to see how your store looks now so you can compare.
Related articles:
- If the pre-order button doesn't show in your store: Shopify pre-order button not showing? Causes and fixes
- Seeing what else SellRules does: SellRules features
- Choosing how to sell, from pre-orders and made-to-order to limited quantities: How to set up early-access and limited sales on Shopify
- What to check during your trial: Five-minute quick start (run a pre-order on a test product)
- How text is shown automatically in each language: Storefront wording and languages
The mug and the word “Reserve” are examples for illustration.