
Organizing the Best Workflow for CSV Export from Shopify to Click Post
If you want to import Shopify order data into Click Post, the standard approach is to go through a CSV file. You export the order CSV from Shopify and upload it to Click Post's Bulk Application feature.
The overall flow sounds simple, but in practice there are several small points where things often break.
In this article, I organize the CSV export workflow from Shopify to Click Post and explain what matters if you want imports to work without errors. I write this from the perspective of an active merchant with three years of Shopify experience and more than 2,200 shipped orders.
Why You Need to Go Through CSV in the First Place
Click Post does not provide a public API
There are generally two ways to connect Shopify with an external shipping service: API integration and CSV integration.
Some shipping services, such as Yamato's B2 Cloud or Sagawa's eHiden, offer direct API-based workflows with Shopify. But Japan Post's Click Post does not provide a public API for that kind of direct integration.
That means the practical way to pass Shopify order data into Click Post is to export it as a CSV file and upload that file from the Click Post admin interface.
CSV integration also has its own strengths
At first glance, the lack of an API may look like a disadvantage. But CSV workflows have their own benefits:
- The mechanism is simple: You download a file and upload it. Even if a network issue happens mid-process, the file remains with you.
- You can inspect the data visually: By opening the CSV in Excel or a spreadsheet, you can check the content before uploading.
- Less dependency on external service behavior: Compared with API integrations, CSV workflows are less vulnerable to unexpected changes or maintenance on the service side.
For solo merchants and small stores in particular, that simplicity can be reassuring because you can usually trace problems yourself when something goes wrong.
The CSV Format Click Post Accepts
The CSV file imported through Click Post's Bulk Application must follow a predefined format. You can download the template from the official Click Post site. The main fields are as follows.
| Field | Description | Notes |
|---|---|---|
| Recipient postal code | 7 digits without hyphen | Full-width digits cause an error |
| Recipient name | Customer name | Use full-width Japanese characters |
| Recipient honorific | Such as sama | Optional |
| Address line 1 | Prefecture | Required |
| Address line 2 | City / ward / town | Required |
| Address line 3 | Street address | Required |
| Address line 4 | Building / room number | Optional |
| Item description | Product description | For example goods or accessories |
The most important point is this: the address can use up to four fields, and each field must stay within 20 full-width characters, or 40 half-width characters.
Address Splitting Is the Main Cause of CSV Import Errors
Shopify address data cannot be used as-is
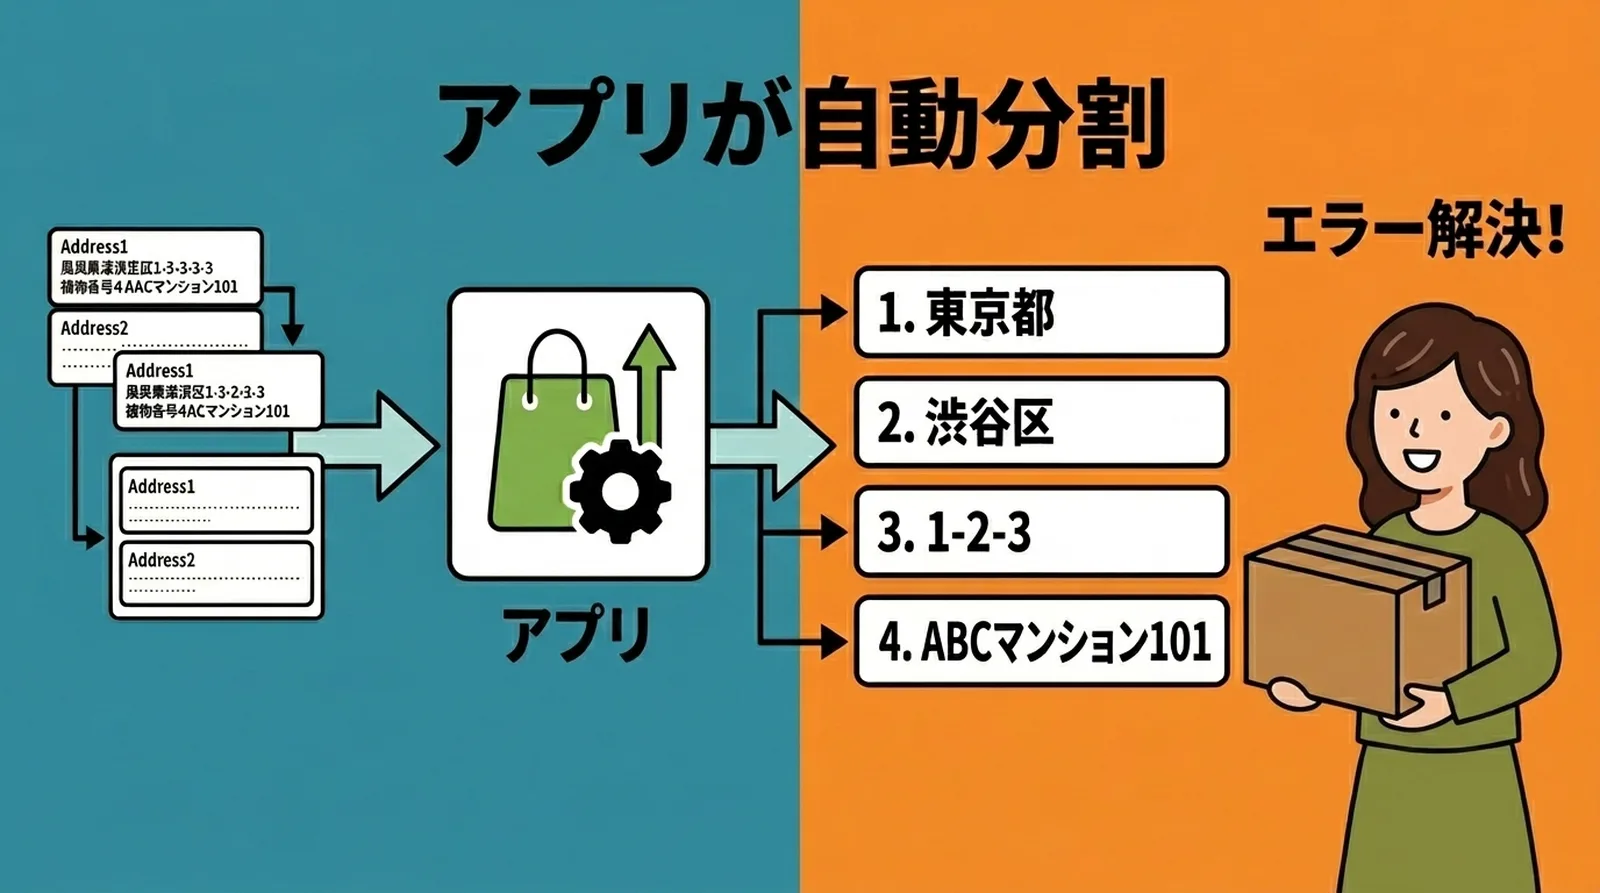
Shopify stores shipping addresses in two main fields, Address1 and Address2. Those fields contain whatever the customer entered at checkout, so the way the address is split varies from order to order.
Even the same address can appear in patterns like these:
- Address1:
東京都渋谷区神宮前1-2-3/ Address2:ABCマンション101 - Address1:
東京都渋谷区神宮前/ Address2:1-2-3 ABCマンション101 - Address1:
渋谷区神宮前1-2-3 ABCマンション101/ Address2: blank
Unless you redistribute this data into Click Post's address fields correctly, CSV import errors will occur.
Shopify uses two broad address fields, while Click Post expects up to four fields with a strict 20 full-width character limit per field. This structural mismatch is the main reason CSV imports fail.
Manual splitting becomes unrealistic as order volume grows
If you have only a few shipments, you can fix the CSV by hand in Excel. But doing that for every shipping batch is not realistic. Addresses vary widely, and some do not include a district marker, while others mix formats such as 1丁目2番地3号 and 1-2-3.
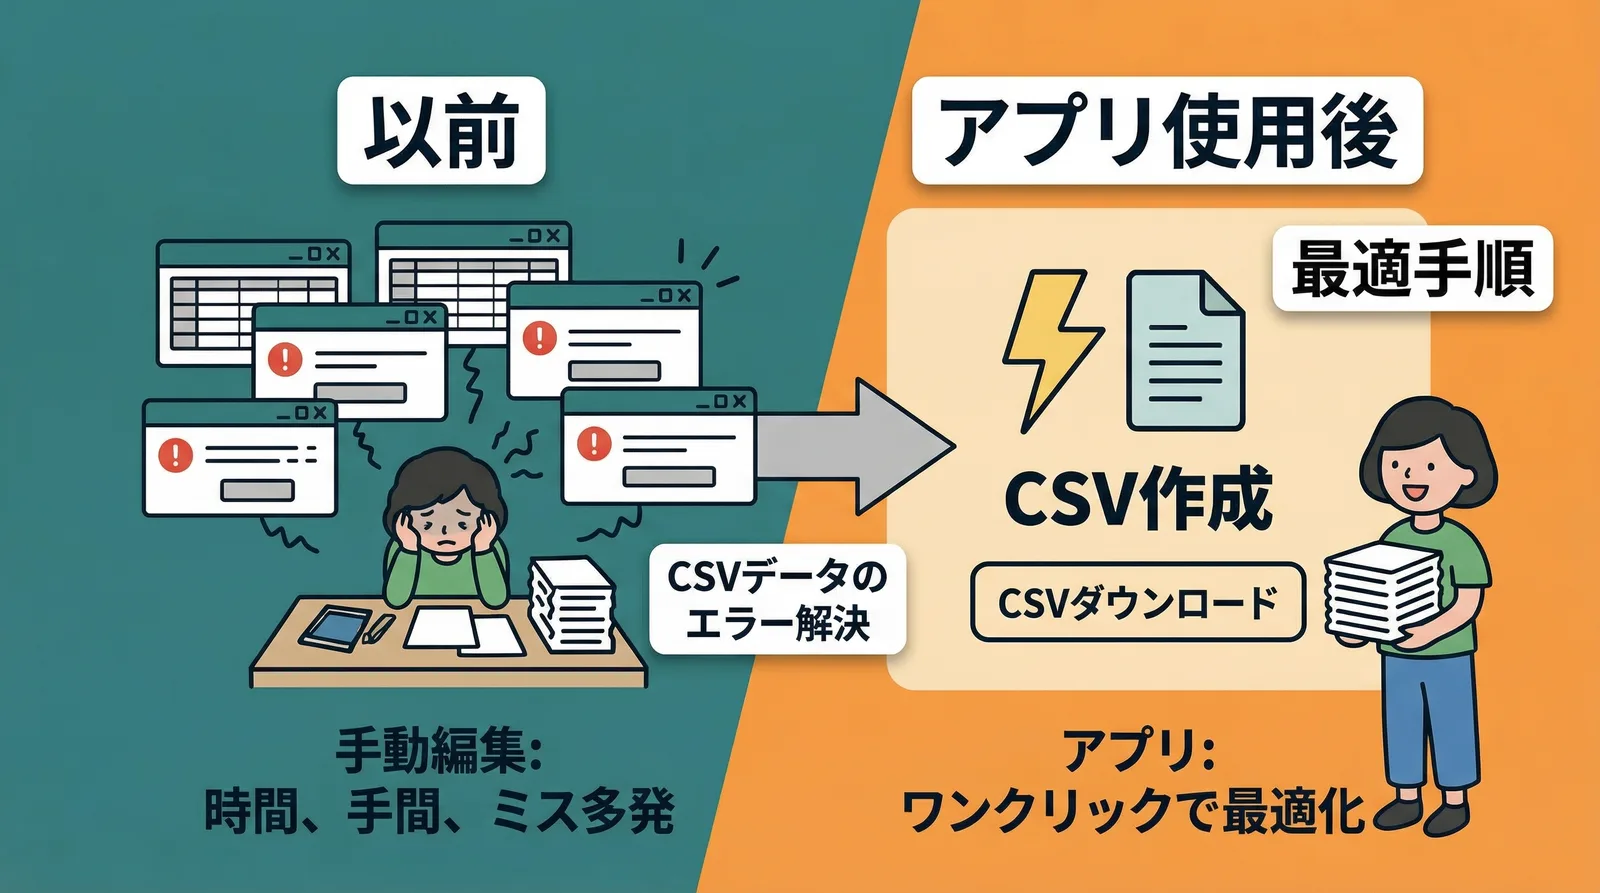
Before I built my own tool, I sometimes used a basic CSV export app and still ran into Click Post import errors because the address splitting was imperfect. On high-volume days, hunting through the CSV line by line to fix issues like "prefecture missing" or "street address pushed into the wrong line" was one of the most frustrating parts of shipping.
Automatic splitting with the app
Instant Shipping! for Click Post automatically splits address data during CSV export to fit Click Post's constraints. It detects the prefecture, separates the city or ward, and divides street addresses and building names for each order.
I have kept using this automatic splitting in my own operations across more than 2,200 shipments, and so far I have not had Click Post CSV imports fail due to address splitting. It removes both the editing work and the time spent troubleshooting import errors.
The Actual CSV Export Workflow
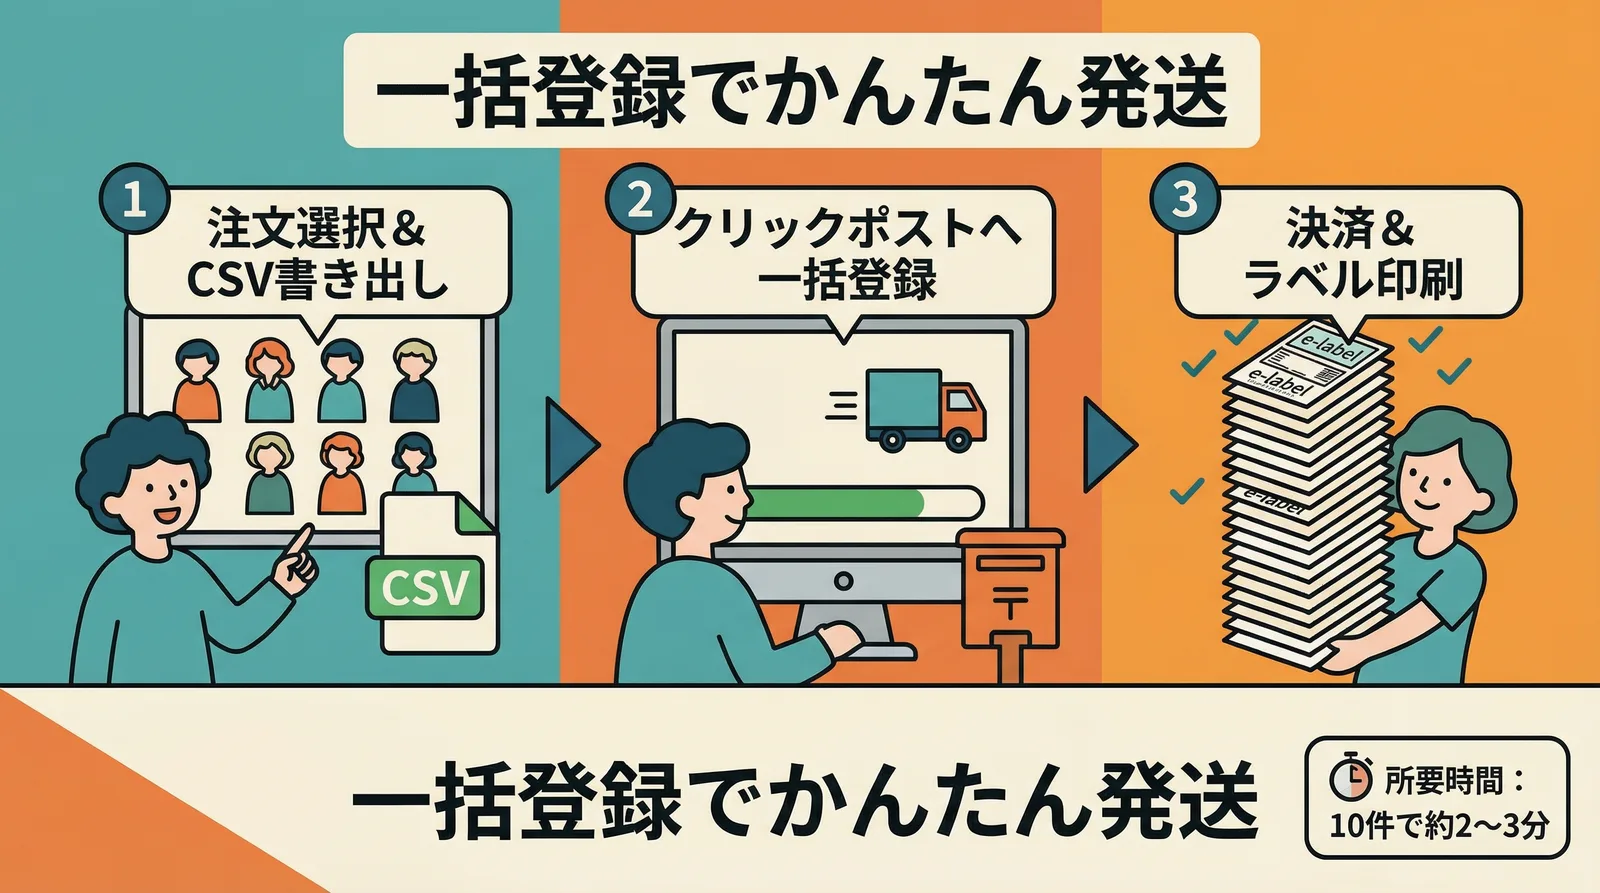
Step 1: Select unfulfilled orders
From the Shopify admin or the app's order list, select the orders you want to ship. You can filter only unfulfilled orders, so there is no risk of mixing them with orders that have already shipped.
Step 2: Export the CSV
Export the selected orders in CSV format. During export, the following steps are handled automatically:
- Address splitting to fit the character limits
- Removal of hyphens from postal codes and conversion to half-width characters
- Setting the item description
- Conversion into Click Post's required CSV format
The exported CSV is ready to upload to Click Post without any manual processing.
There is no need to open the exported CSV in Excel and edit it. You can upload it directly to Click Post as-is.
Step 3: Upload the CSV into Click Post bulk application
Log in to the Click Post dashboard and upload the CSV through Bulk Application. If everything looks correct, complete payment and download the shipping labels.
For 10 orders, this part usually takes about 2 to 3 minutes.
Common CSV Export Problems and How to Avoid Them
Q. I uploaded the CSV and got an error
The most common causes of Click Post upload errors are:
- Incorrect address splitting: for example, the prefecture is missing or the street number is placed in the wrong line
- Invalid postal code format: full-width digits or hyphens remain in the value
- Wrong character encoding: Click Post accepts Shift_JIS only, so other encodings can cause garbled text
If the CSV is exported from the app, both the format and the encoding are controlled during export, so these issues generally do not occur. If you edit the CSV manually, pay close attention to how it is saved.
Q. A CSV created on a Mac becomes garbled
If you open and save the file with Excel or Numbers on macOS, the CSV may be saved as UTF-8 without BOM. That often causes garbled text when you upload it to Click Post.
The safest solution is either to reopen the CSV in a text editor and save it again as Shift_JIS, or simply use the CSV exported directly from the app without opening it in Excel first.
Q. What if I exceed Click Post's 40-order bulk limit?
Click Post limits each Bulk Application upload to 40 orders. If you have 41 or more, you need to split the CSV and upload it in multiple rounds.
The app can export in 40-order batches, or you can split a larger CSV afterward. Since tracking-number sync from shipping labels can still be handled efficiently, the later steps do not become much harder even if the CSV is split.
Conclusion
CSV export from Shopify to Click Post works smoothly if you handle three points correctly: address splitting, format conversion, and character encoding.
When you edit CSV files manually, errors often come from address mistakes or encoding issues. With an app, the CSV can be exported in a state that is already ready for Click Post, which removes both manual edits and the time spent troubleshooting errors.
If you also want to streamline the post-shipping step and eliminate manual tracking-number entry, read how to eliminate manual tracking-number entry as well.